Here is my entry for @deemarshall's Butterfly colouring contest #10
@chelsea88 requested a GIMP tutorial, so here is one for this coloring contest.
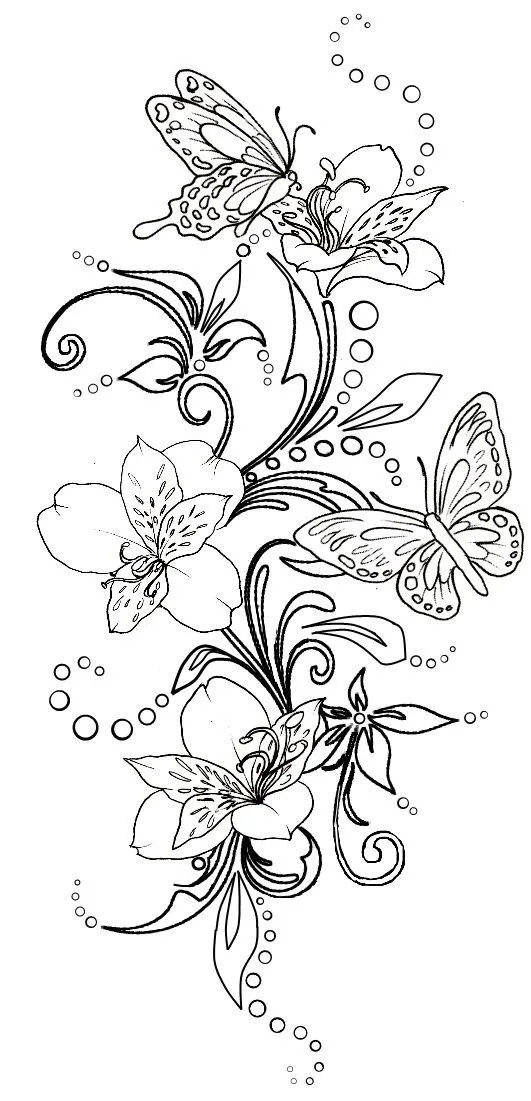
This is the image we started with.
Preparing the canvas
So, the first thing I did after opening the image in GIMP was to go over to the layers dialog and right click on the layer. I then choose the option "add alpha layer" - this allows you to make a transparent background.
Next, I click on the "fuzzy select" tool (the magic wand) and I click on all the areas, one at a time, that I want to be in my background and I "delete" each spot.
All those spots will now have a checkerboard appearance in GIMP.
The next thing I did (mostly a "just in case" step) was to right click on the layer again and "duplicate" the layer. You can toggle on/off the visibility as needed. I've been finding more recently that it's a good idea to have this duplicate on hand - you never know when you're going to need it!
Painting!
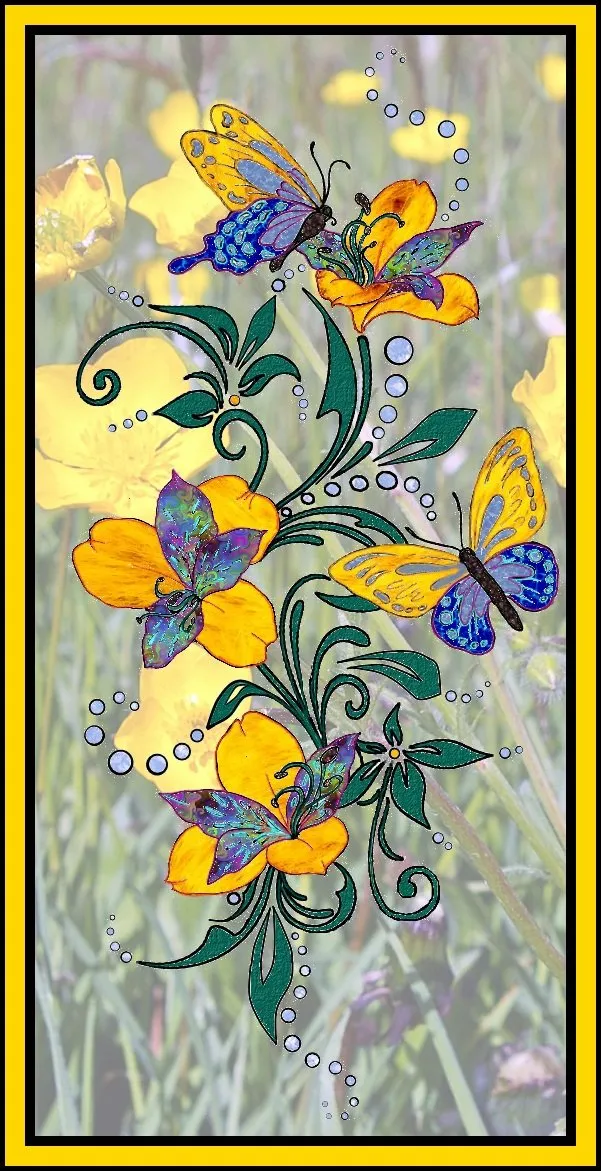
Finally, we're on to the fun part. I have been having a lot of fun with the paint bucket recently, so I looked through my patterns and started filling in what I felt like... some yellow fur that I picked up recently (another tutorial sometime) and some other bits that I just liked the look of.
Next, I used the paintbrush to fill in gaps left behind by the paint bucket. I'm working at 800% zoom on this one, the maximum offered by GIMP. I put the paintbrush to about 5 px and at 90% opacity. I filled out each of the green leaves and stems first. Then, added some brushing to the butterflies and flowers as it felt good to do.
Photo addition
When I was happy with my coloring, I clicked on "open as layers" and looked through my image collection to find something that didn't overwhelm the delicate butterflies. I finally settled on this image of buttercups that I took a few years ago in England. (Probably in Warminster where I was living at the time.)
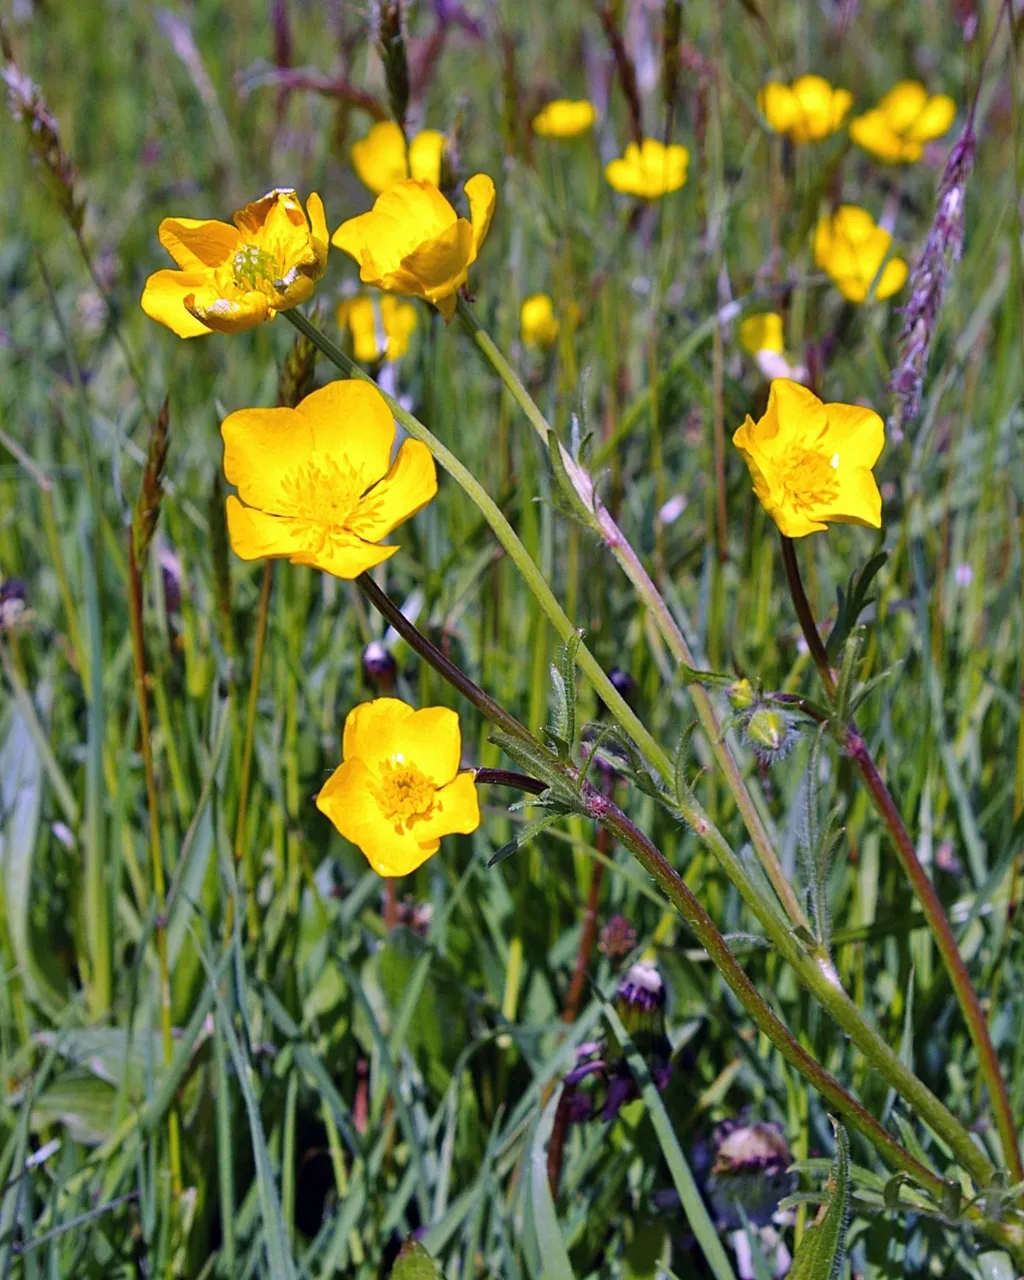
(image by myself in 2010)
Firstly, I had to drag this layer to be below the other layers so that my butterflies would be on top.
It was too large and too bold as is, so I right clicked on the image's layer (in the layer dialogue) and selected "scale layer". I chose to scale by 60% which turned out just about right. With this layer still selected, I reduced the opacity of the layers (at the top of the layer dialogue still) to about 50%.

So, then my final step is to go over to Photoscape (FREE!!!) and add the margins. I think it adds a nice polish to my image and it's just easier to do this in Photoscape than anywhere else I've looked. For this one, I used 10 px the inner black layer, then 20 px in golden yellow, and about 7 px on the outer black trim.

Lori Svensen
author/designer at A'mara Books
photographer/graphic artist for Viking Visual
now also on: Whaleshares and WeKu

Banner by @shai-hulud