Here are my next steps as I work on my map of the continent of Kranisis - needed for my upcoming story Ocean of Empathy.
Last time, I showed you a little of how I got my slate clean in order to build my map.
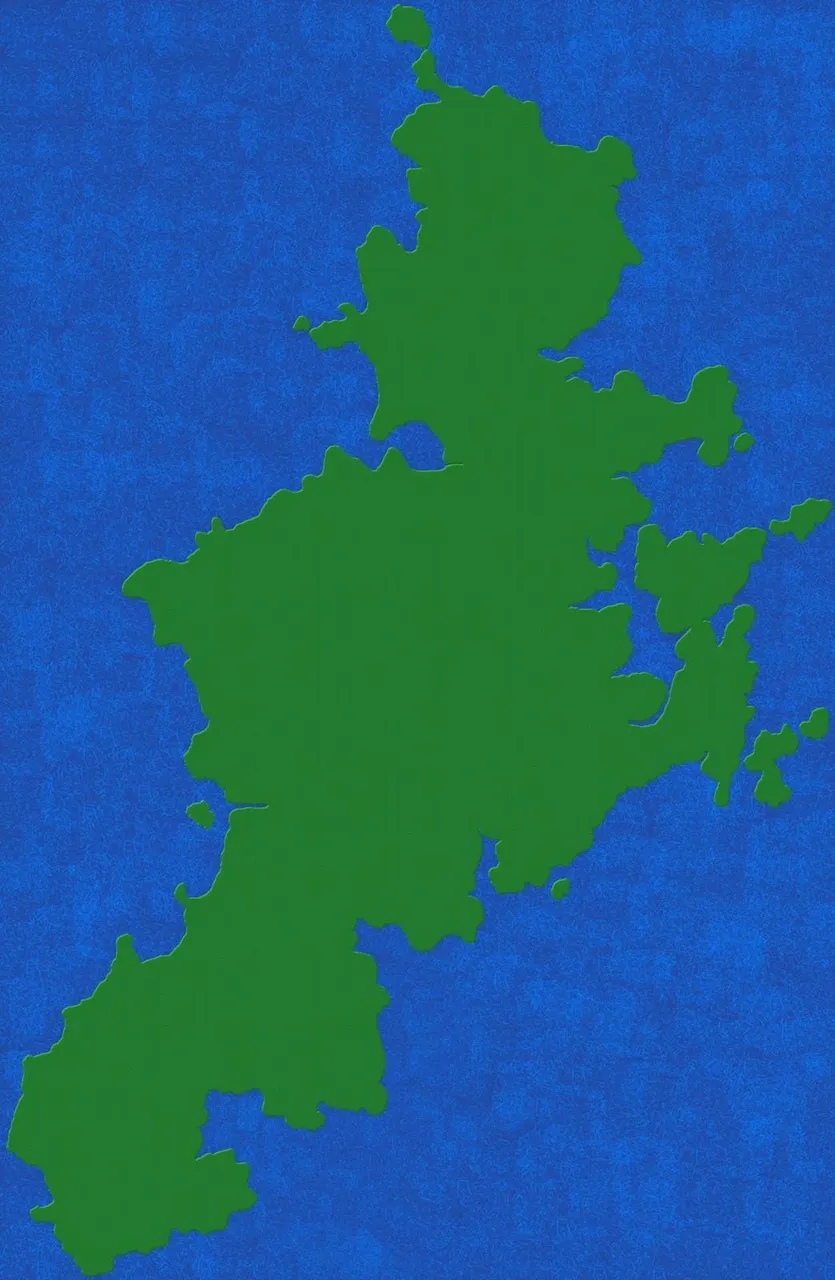
Step 4 - Adding texture
I activate the "water" layer.
I use the "paintbrush" tool and select the "grass" brush with a large size and grab a lighter sea color. I carefully dab the brush all over my water which makes it look cool and mottled - a little like water.
Next, I activate the "land" layer.
I can't quite do the same thing with the land because it's an upper layer and will mess up my water. So, instead, I use the grassy pattern with my "bucket fill" tool. You can use other images to fill your land, but that wasn't working for me this time, so I changed plans.
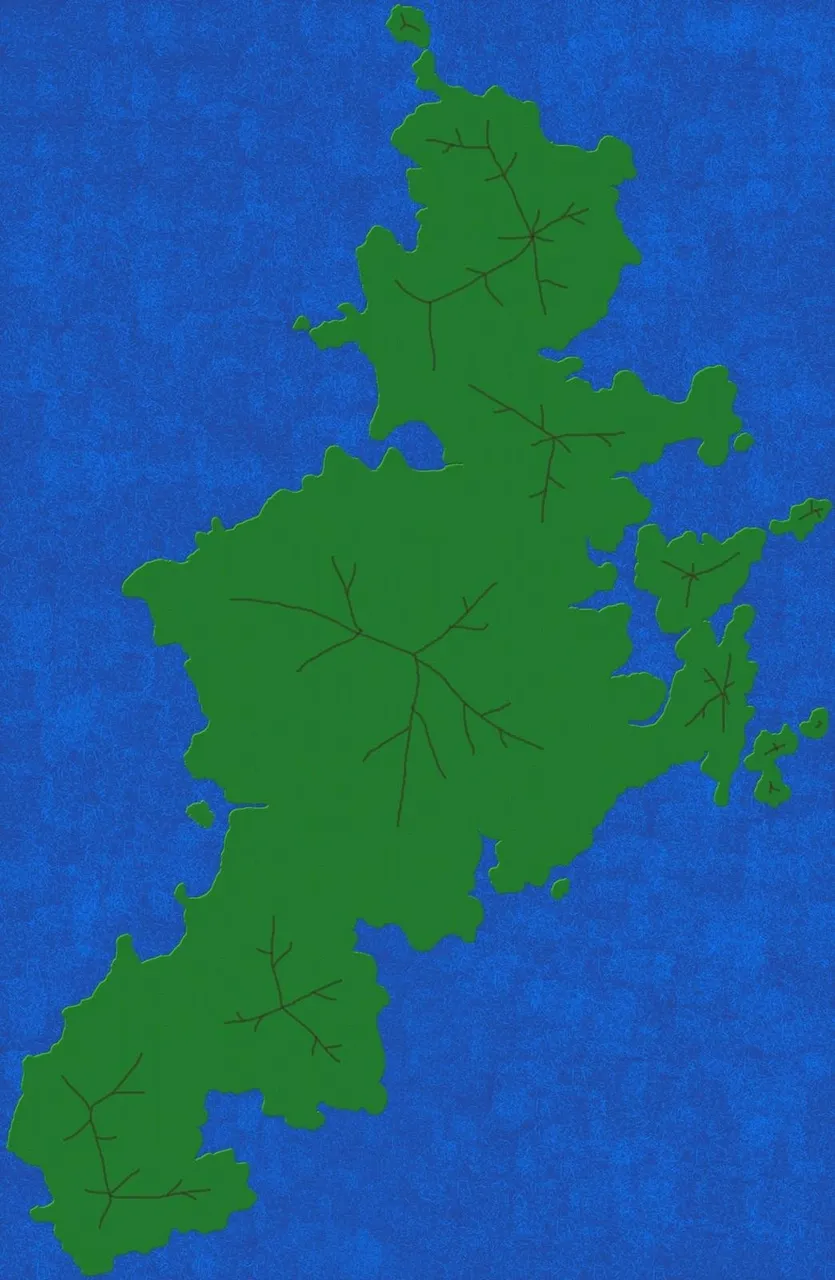
Step 5 - Drawing on mountains
Click on your "land" layer if it's not current.
Add a new layer called "mountains." Make sure this one is active.
I decided fairly quickly that I didn't like the mountain "stamps" that I could find in various places. The best ones cost too much (for someone on a strict budget) or couldn't be used commerically. Even the best ones get repetitive when creating an entire planet! So, I went to YouTube in search for answers.
The answer turned out to be really simple - lots of lines - to follow the top-down contours of a mountain, ridge or chain. A much better solution for lands that I'd already partly designed!
To do this, I used the pencil tool with a small brush size. I also used a brown instead of black and reduced opacity to 50%.
Step 6 - Giving the mountains a 3D treatment.
This is step slightly more involved, but it makes a huge difference to the map.
From my "land" layer, I make a layer called "dark." Above the layers area, I select "mode" and choose "multiply" from the drop-down menu.
From this "dark" layer (activated,) I choose a the paintbrush tool and a solid or spray brush. I bring opacity down to 10% (sometimes, I need 20%) and using black, I paint shadows on the mountains opposite the direction of the light - so, on the bottom and right sides in this map. i started with the largest brush I needed and worked down to smaller details, going back over similar areas where I felt it needed more shade.
Back to the "land" layer.
I make another layer called "light." This time, in the "mode" drop-down menu, I choose "overlay." Again, I choose the paintbrush tool and a solid or spray brush. The opacity is down around 10%. This time, using white, I highlight the lighter sides of the mountains - on the same side as the light source, so on the top and left sides of this map. Again, I started with the largest brush I needed and worked down to the smaller details.
This is what it looks like after this step.
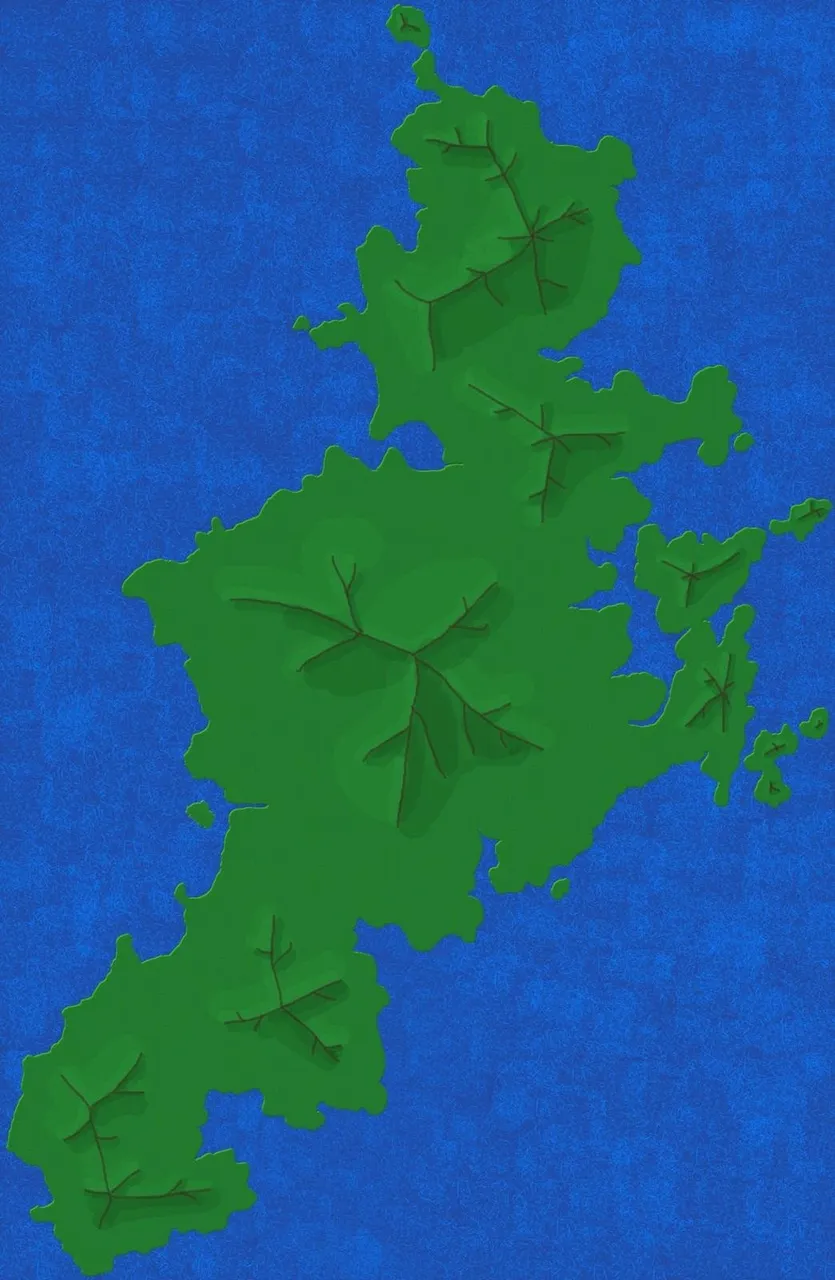
Wow - those mountains are really popping out now, aren't they?!
Next stage, we'll finish the physical geography.

Lori – photographer at Viking Visual, author at A’mara books, student-of-the-world.
Banner by @shai-hulud