This one is a pure GEM for me as I've learned bunch of new techniques, that are more precise, giving best end-results + maybe the most important take less time for better results.

Through this post I will explain some of the techniques, and most of all my favourite - custom brushes. Custom brushes are honestly something that changed my view of graphic design both, generally and within my projects. Before I've learnt the technique I would spend too much time finding the right image that fits perfectly to my idea and ending results I want to achieve. Due to my thoroughness and effort, in about 70-80% I would be satisfied and happy with the results.
...But what about with the remaining percentage
I find myself as a person that wants everything perfect and ideal, especially in visual aspect. I don't say I'm a freak that hates everything that's not how I see it, but in my projects, where the only effort & emotion is mine, I like it to make perfect. If I don't have knowledge about anything that bothers me, I find the way to learn something new for the benefit of progress.
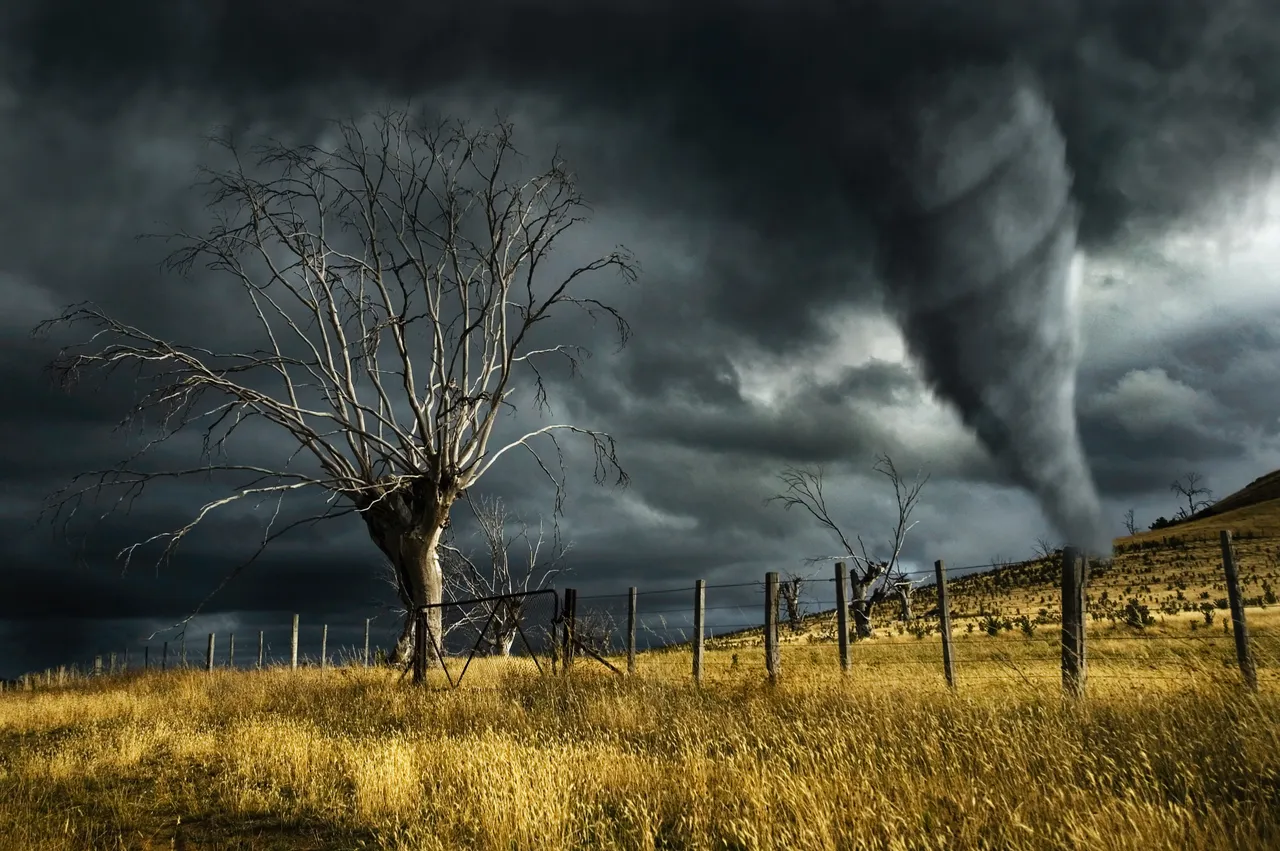
Project "TORNADO"
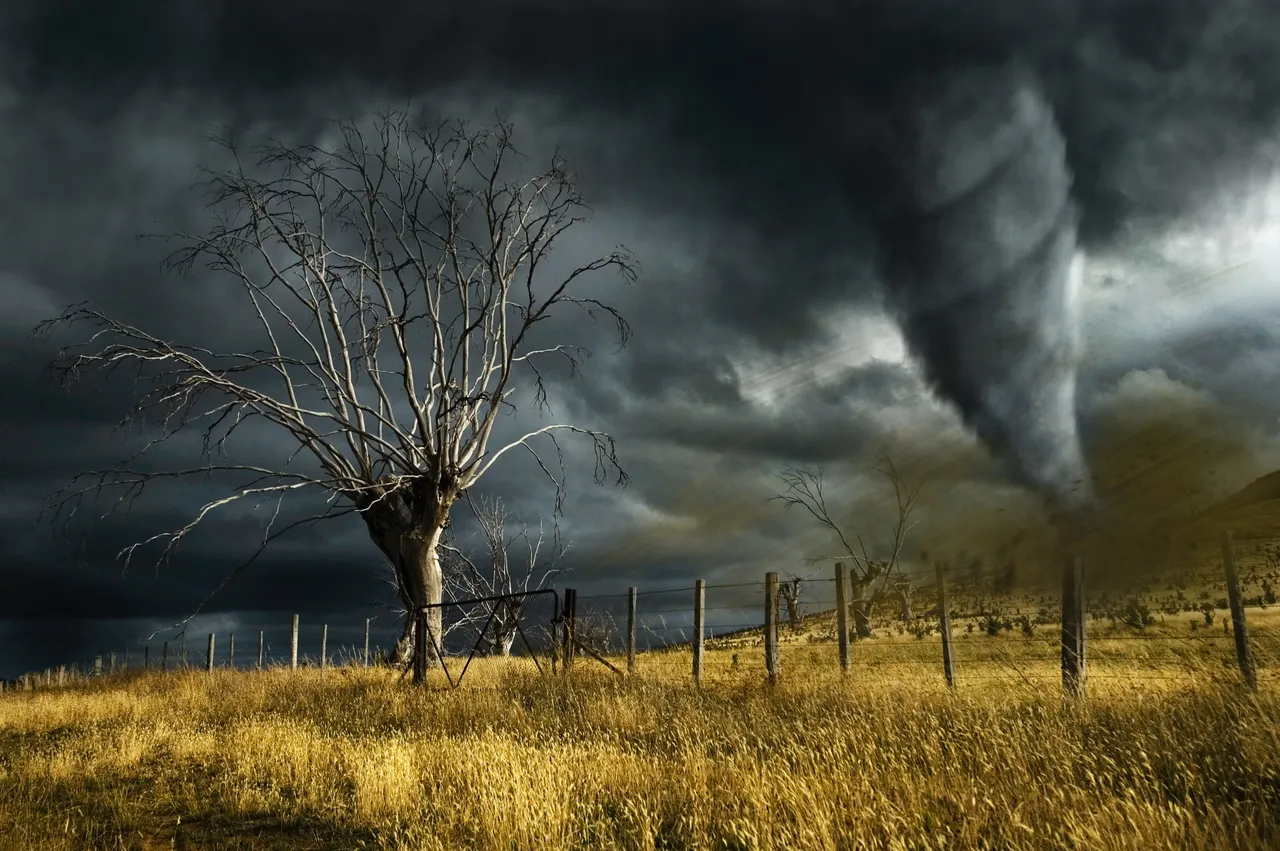
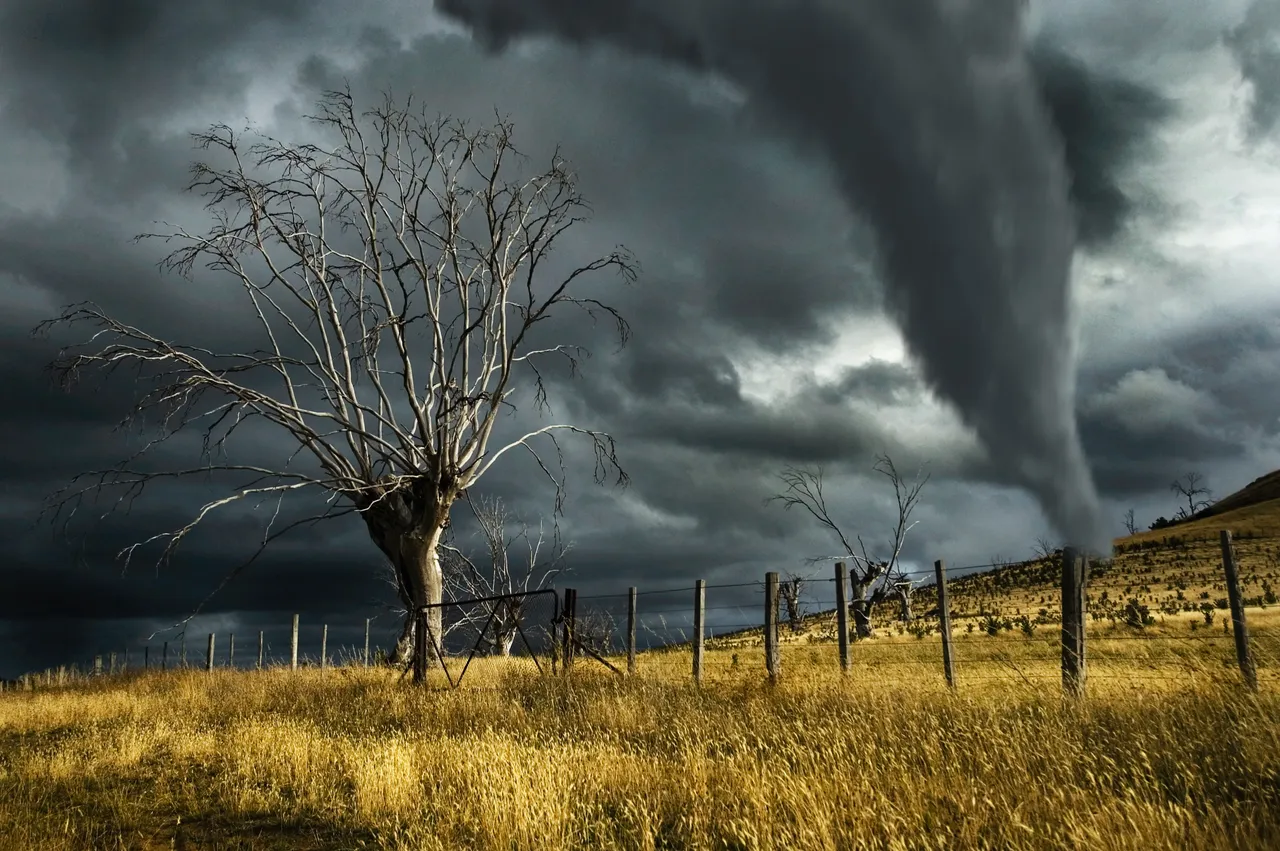
- Finished version of the Project TORNADO - Photo Manipulation done digitally in Adobe Photoshop on the existing photo.
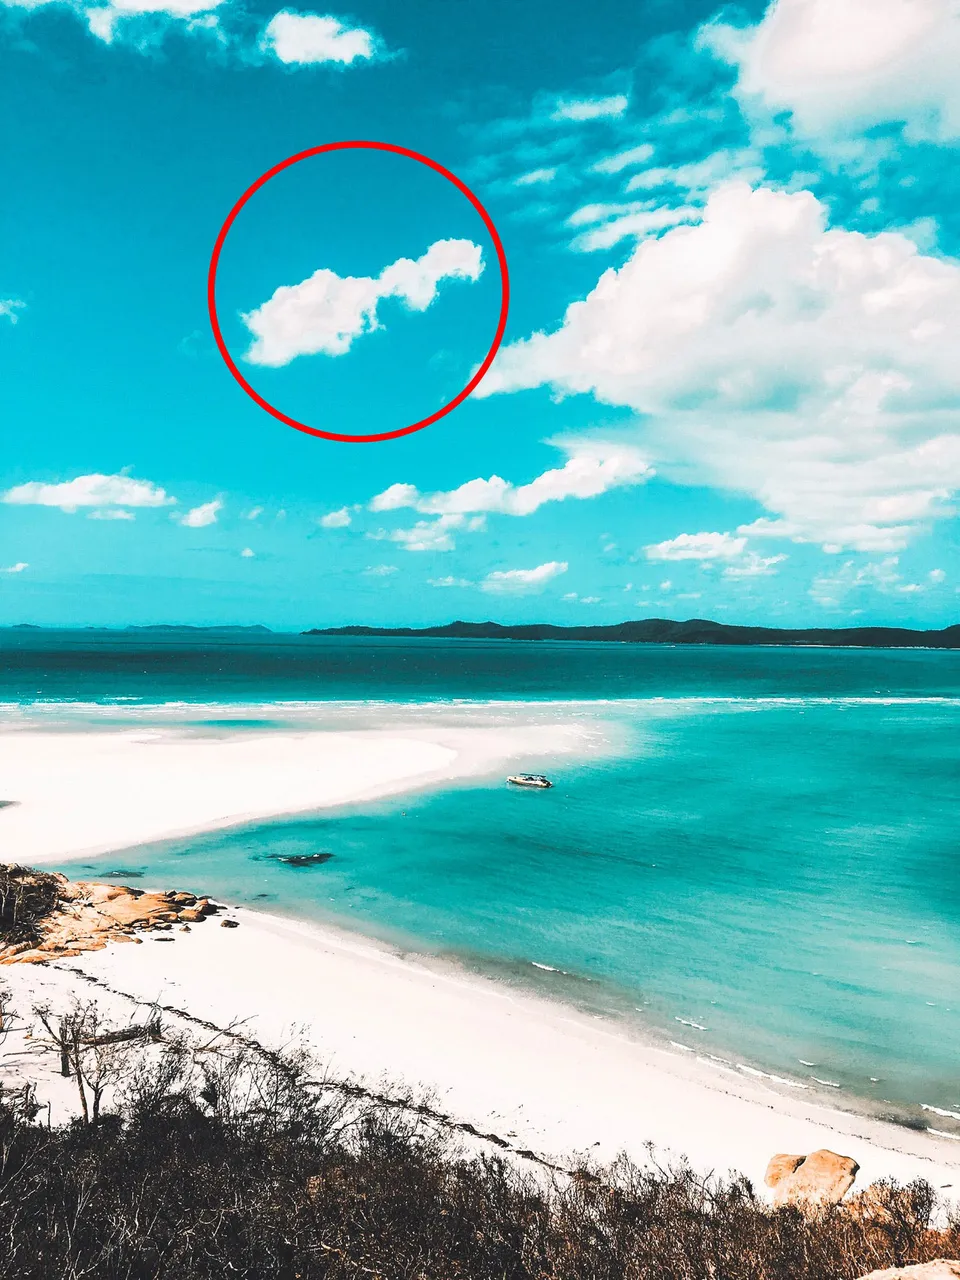
Original Photo
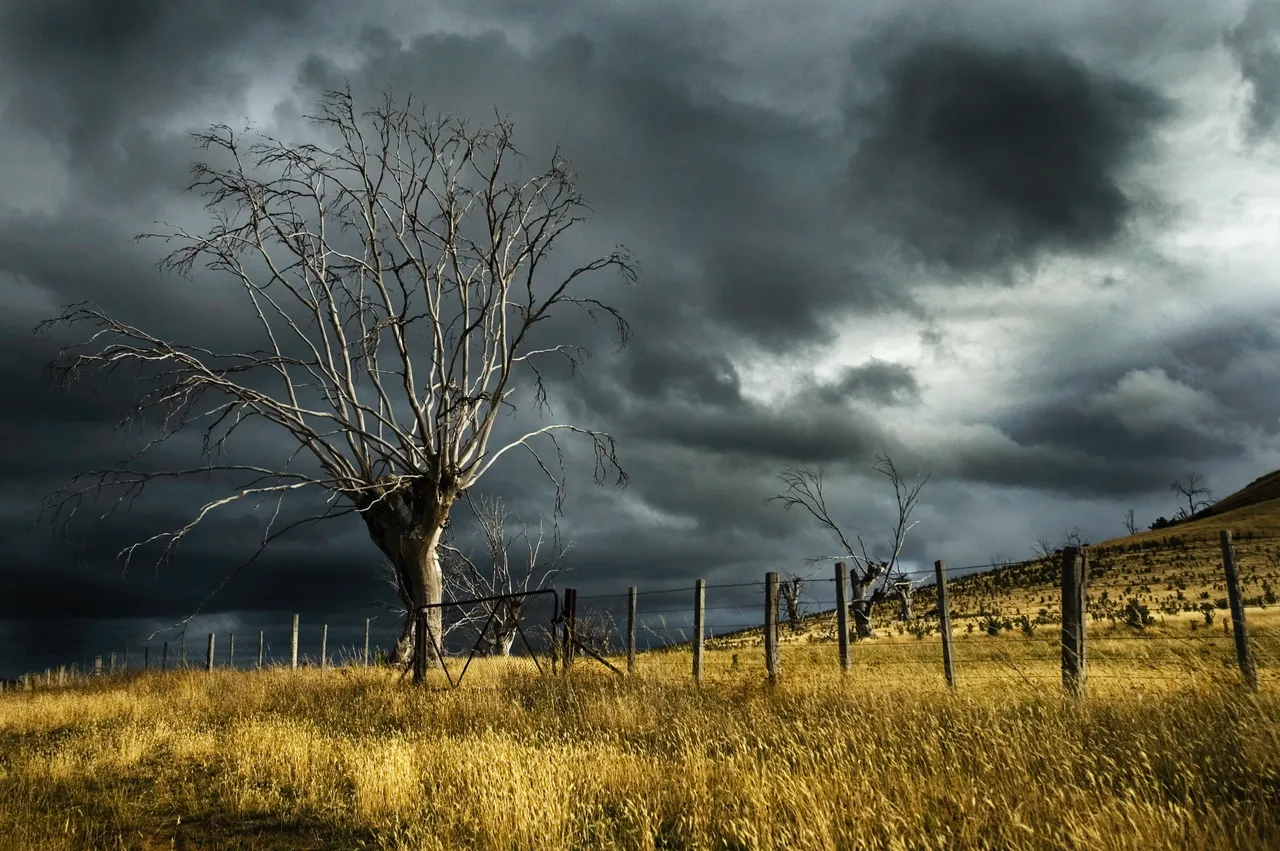
- At the first sight, I knew what I'm about to do on this one. At the time I was browsing and finding the right Photo I wanted to put some artist magic on. As i ADORE to observe and experience thunderstorms and generally chaotic weather I've managed to "install" the tornado right in the place.
At the time I was planning my design, I was too addicted to tornado documentaries - and the one and only logical outcome was this photo manipulation.
Planning & Creating an Idea
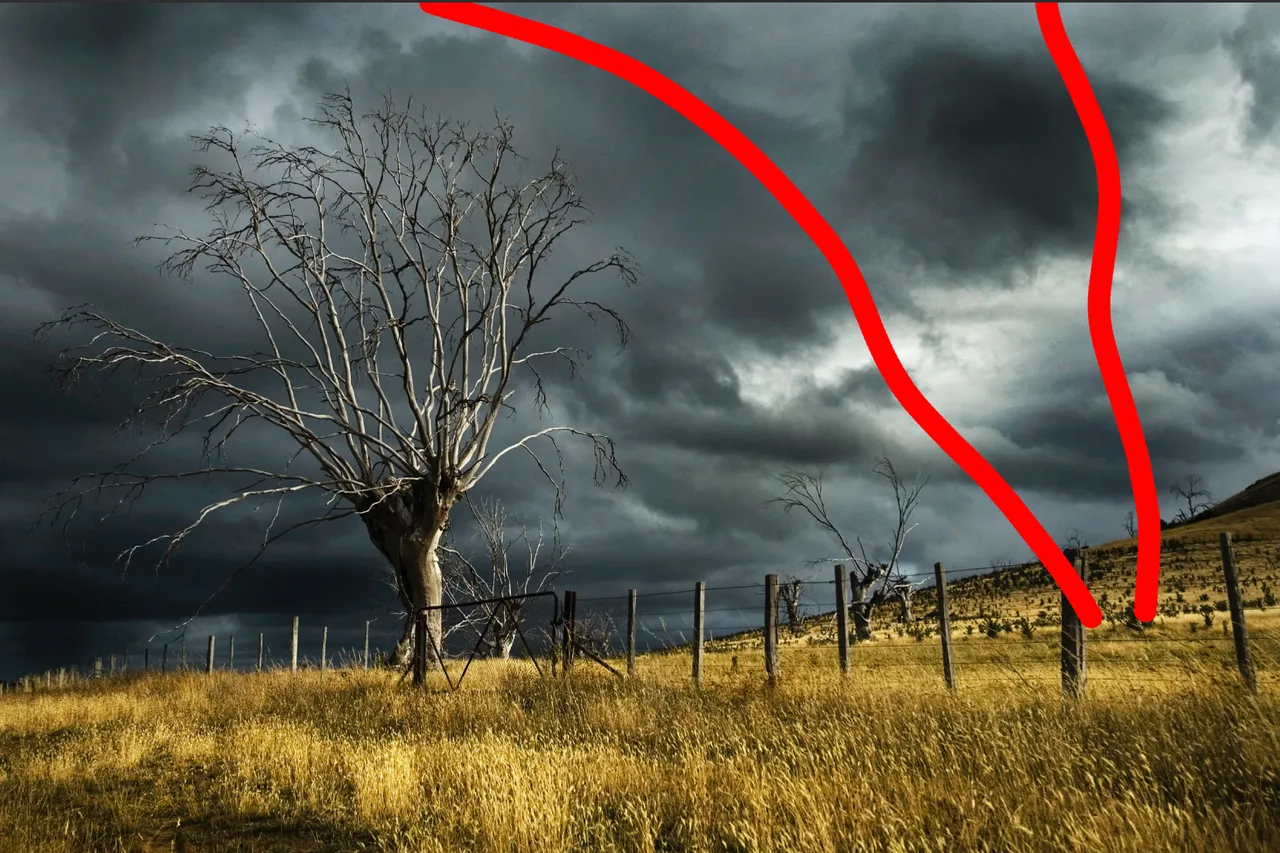
- I've already mentioned in few of my recent projects - In my opinion, planning of the work is the same, if not more important as well as design and digital work itself. In this example I was trying to get right perception of where the tornado will be made. Due to serious and powerful clouds in the background I decided that it will be fat and majestic tornado.
Custom Brush Creation
I claim with certainty that this unique way of creating own custom brushes is the best thing that happened to my improvement since I've started using Photoshop. As a self-learner, I find skills that actually have endlessly space for progress (in this way - custom brushes --> you can make them literally from anything) very useful. Custom brushes can improve your art in both visually & professionally, because it leaves a lot of space for creating new things in a way you see it + it gives immense freedom.
1. Finding Usable Skies Photo
- Browsing through the Pexels, I found a photo I thought has nice clouds which I can select neat and precise (having good contrast of clouds - skies)
In advance I knew which technique will I use in my custom brush creation. That was selecting clouds over RGB Channels, in this case Red Channel because red channel doesn't contain blue color which is most prevalent in the sky. Knowing that information, further work is quite simple - I'll try to explain that little bit deeper with further visual examples followed with explanation.
- In this example, the contrast between skies and clouds is quite visible. I tried to clarify the previous paragraph.
2. Getting a Neat Selection of a Cloud
As I mentioned, the best way in this case is a selection by channels. Every photo is made out of 3 colors in RGB system. RGB stands for Red, Green & Blue. Although, for example, Blue Channel doesn't contain blue color itself, every Channel is in greyscale and is guided by logic: "White means there's color from that channel, while Black presents the lack of the color."
The best fully contrast color channel in this case is definitely the Red one. Skies doesn't contain any of it, so the cloud will remain white, and the background (skies) will remain black (no information) --> That way I will be able to make precise selection of the cloud which will become CUSTOM BRUSH few moments later.
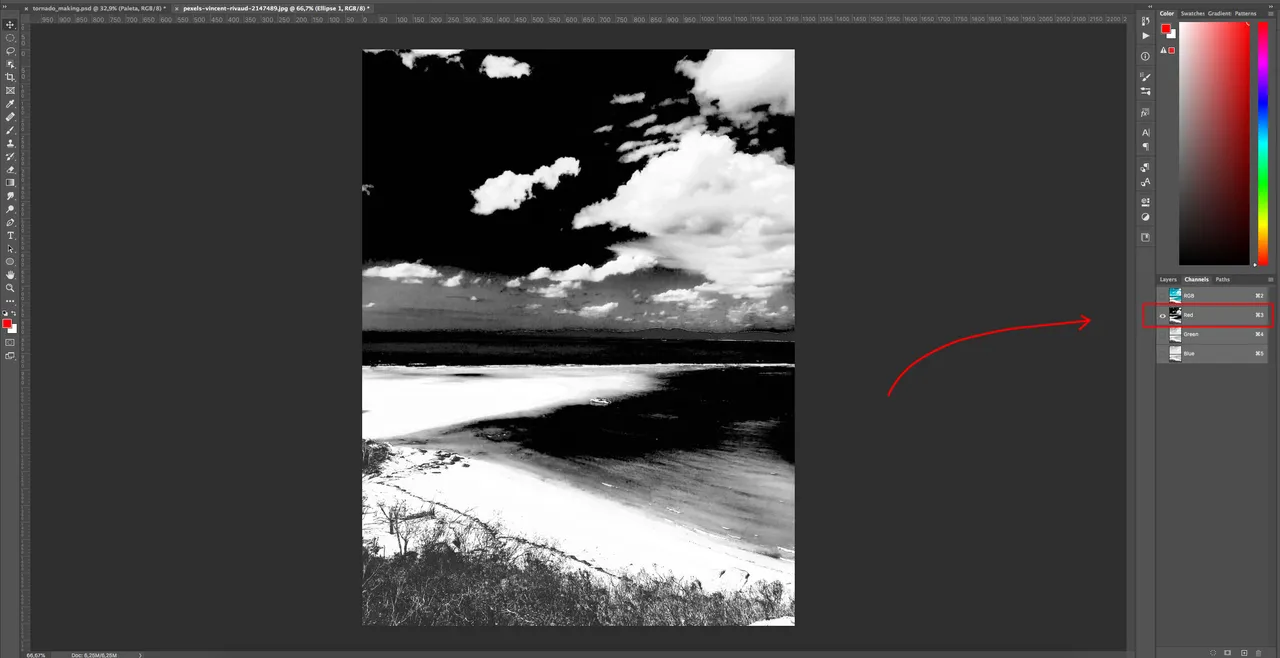
- Open the Photo in separate tab for better quality. Tab "Channels" --> Red Channel for the best contrast.
This example is the best for showing the contrast between the cloud I've picked as my next brush and skies behind it.
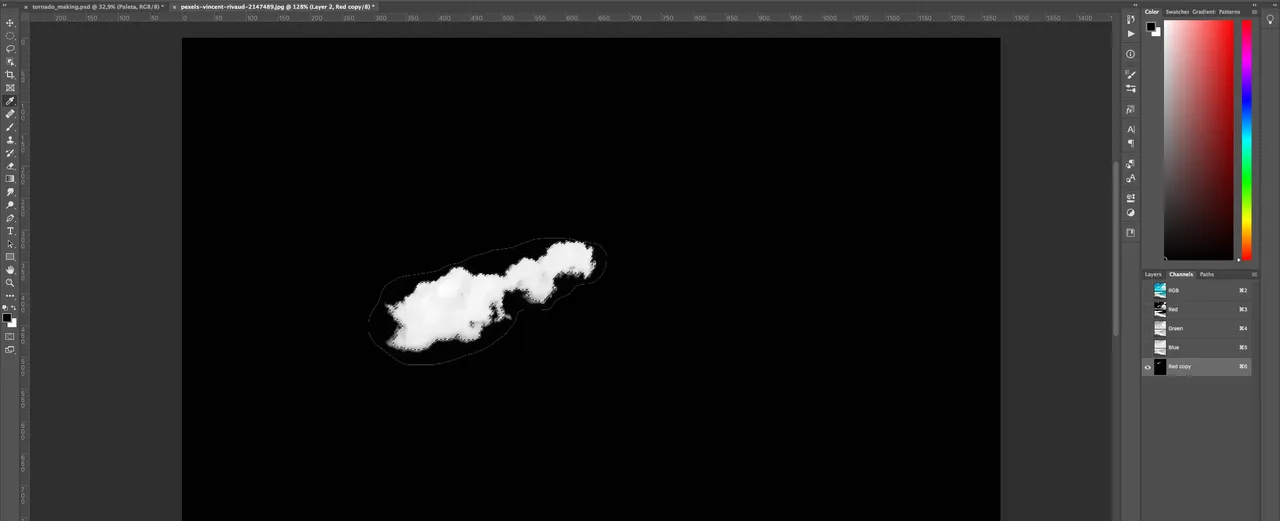
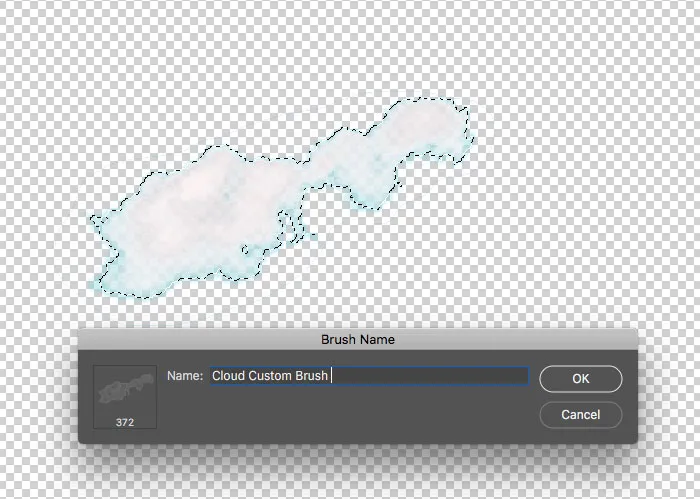
- The process of getting the selection for just 1 cloud (Brush Preset): Making a copy of Red Channel (So I don't make a mess with original photo) --> Making the roughly selection of a cloud I want to be preset for my future brush --> Inverting the selection and making the background black --> With the selection of a cloud, I made the new Layer and that's it, I've got a cloud in separate Layer (Check the image below).

- Cloud without background on the separate Layer. --> Ready for the Brush Preset
3. New Custom Brush Preset
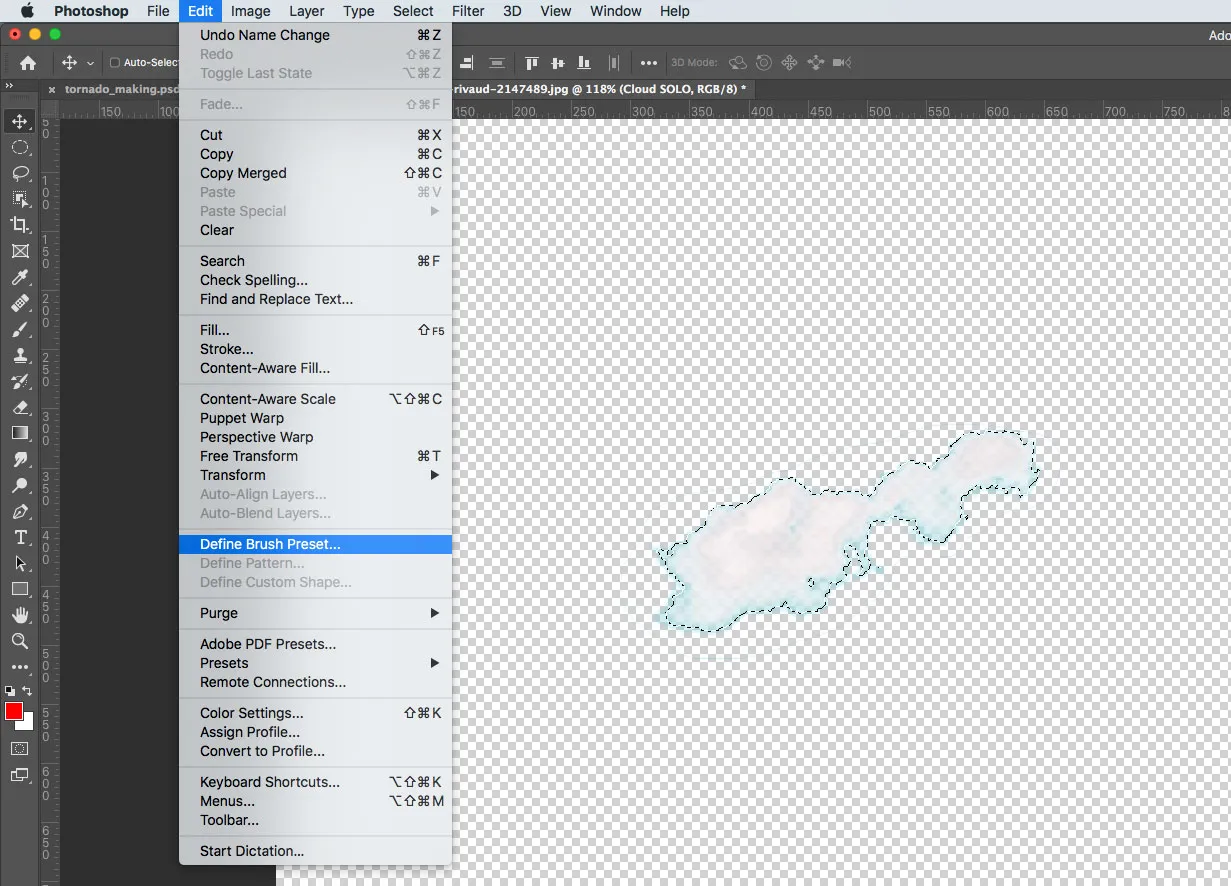
- While the selection is active (CTRL (on Windows) or CMD (on Mac) + Left click) on the Channel I've made, it's ready for defining the new brush.
- With the new Custom Brush I've just made, I was ready for making my tornado on the Original Photo I've started with. That brush is suitable for any kind of smokes, clouds and anything similar.
Painting the Tornado With the New Brush
Let's think where we're now: Original photo is dowloaded and ready, new brush is ready either & the plan of tornado position is done too.
- Tornado is now fully painted with the new brush, but it's still in lack of 3rd dimension. Shadows and perception is very important in making of photorealism.
Dodge & Burn Technique
The dodge and burn technique is one damn strong technique of making manipulation easy and real-looking. It's done with
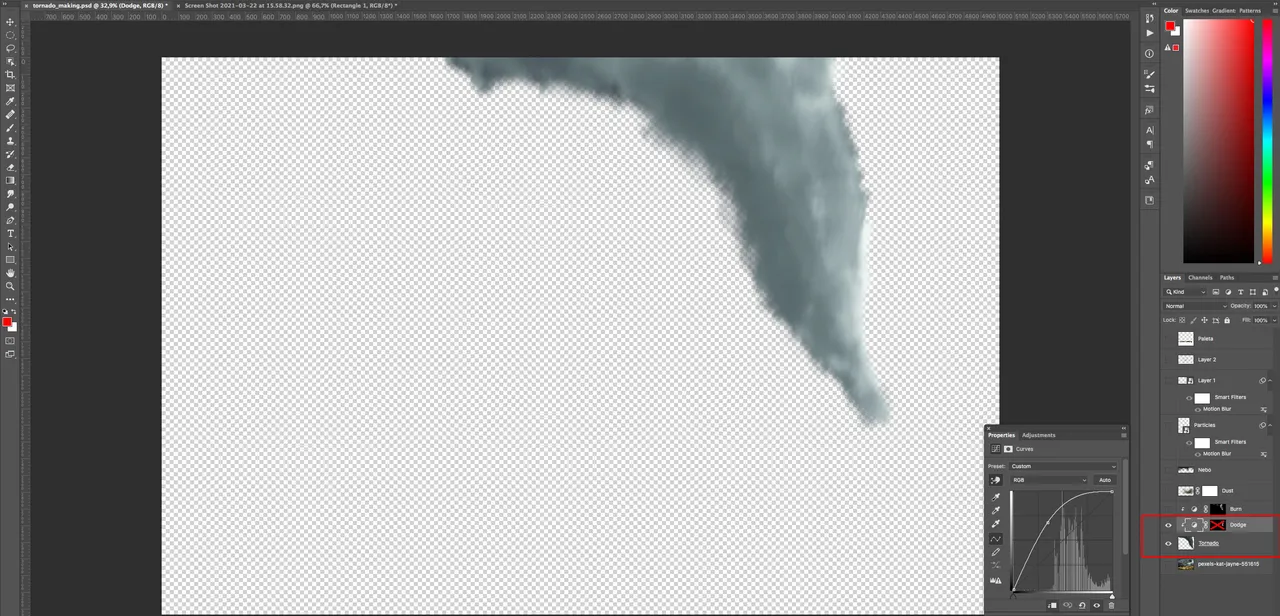
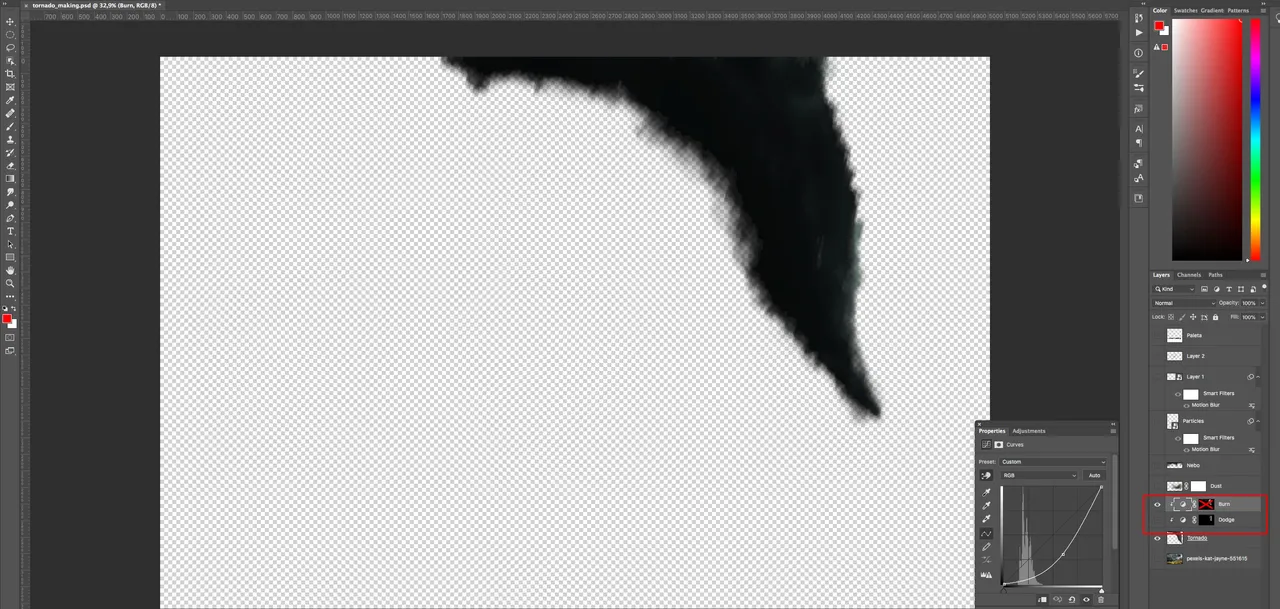
- For the purposes of explanation, I've deactivated masks to see what Burn and Dodge technique starts with. Now, it's the time for art of making masks and with White (what is visible) and Black (not visible) parts that will make tornado as 3d illusion. I'm using Burn places to make some spots darker (like a shadow) & Dodge for the places i want tornado to be brighter (to create an illusion of light hitting that spot).
Finalized Tornado with Burn and Dodge + Masks

- Although at this point the project is only half done, a big difference can already be seen. - Tornado itself is much more realistic.
Finalized Tornado with Darker Clouds (made with the custom brush)
- At this point I was very satisfied with the result. The only thing left for me to do was the particles and the mess tornado would do. In order for artwork to look convincing it is wise to look at realistic references. Conclusion: Particles make everything realistic.
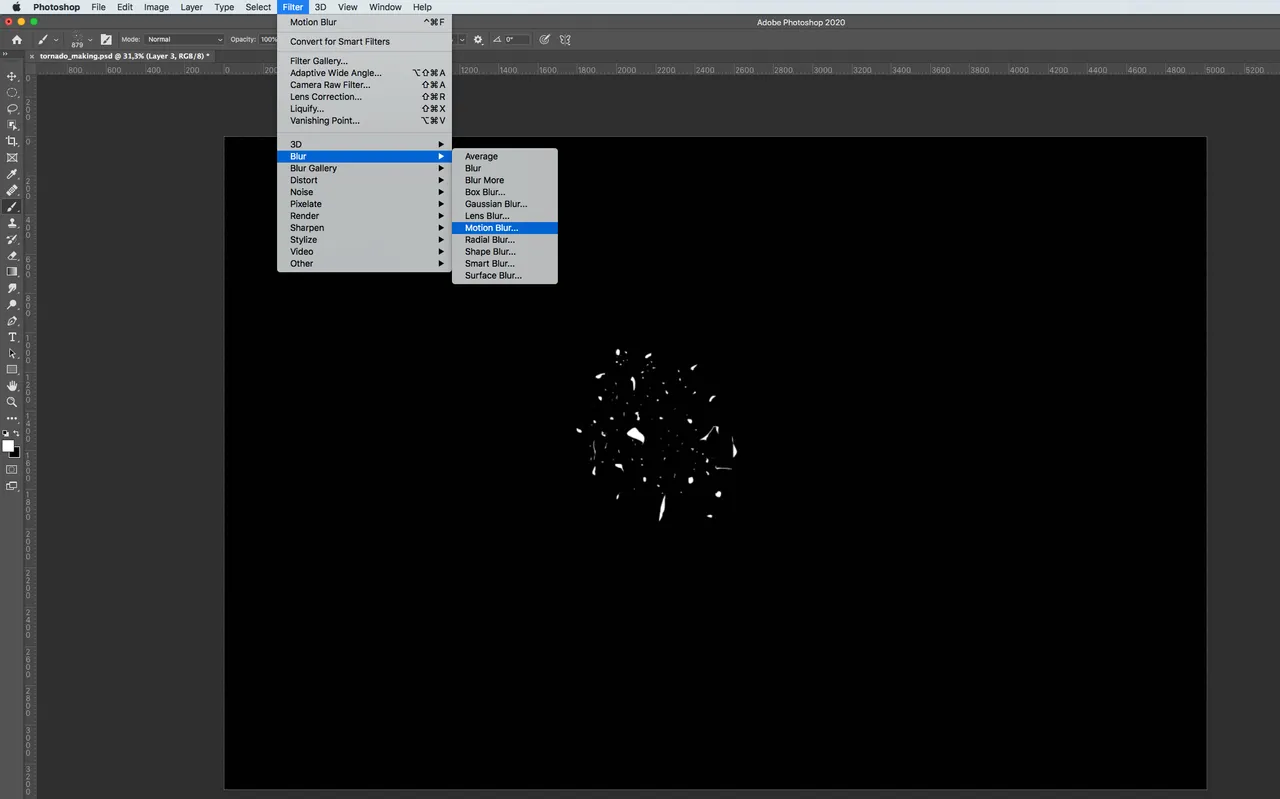
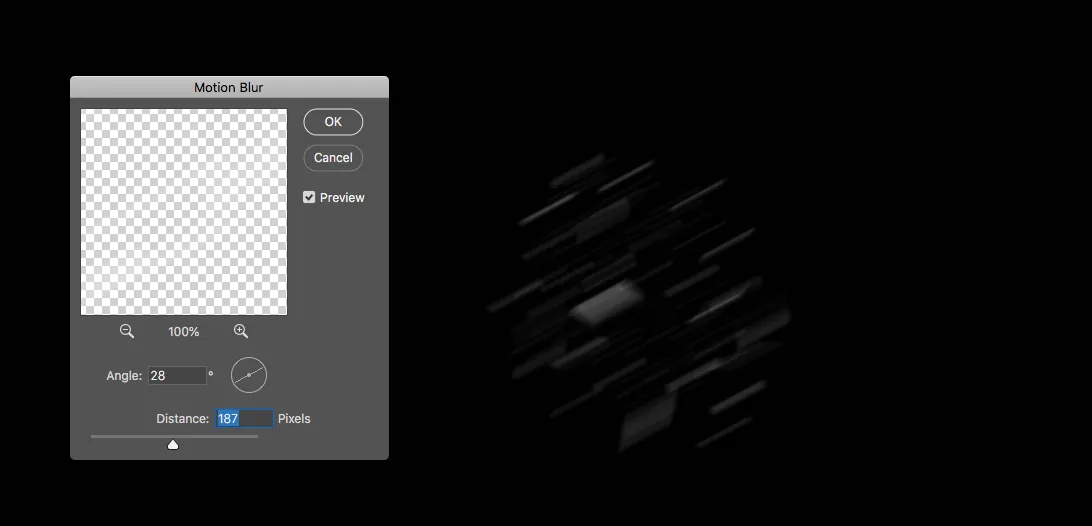
Adding the Particles - Making the Realistic Mess
- For the purposes of the realism, I've made another custom brush - Particles. I managed to do them firstly in Adobe Illustrator as i find it easier & faster for vector shapes. Imported the vector to the Adobe Photoshop and made a new brush. After I painted the particles around the tornado, I've added a slight touch of "Motion Blur" so it looks like the wind is strong and little particles are around it.
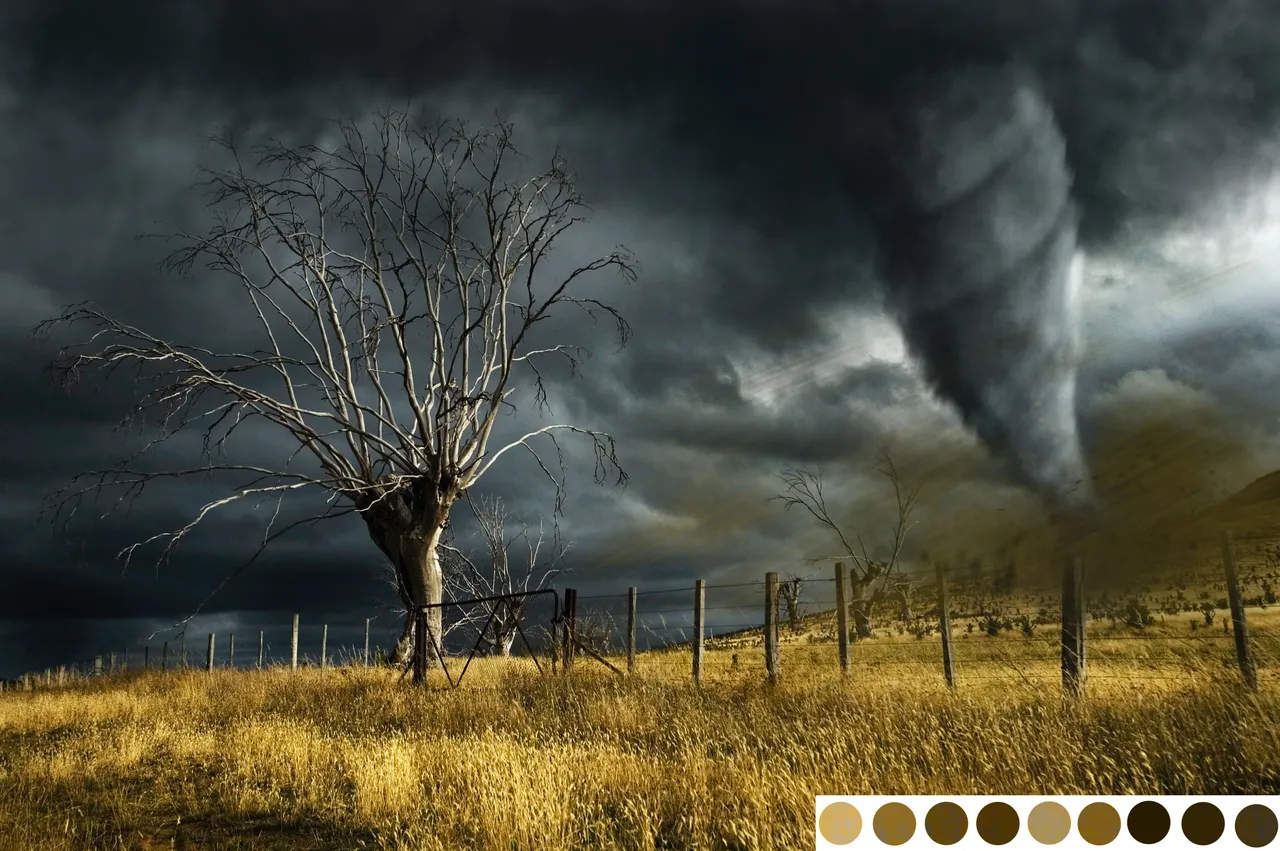
- And of course as always, the part of my routine - Color Palette with colors I've picked from the photo itself.
A lot of great techniques was learned in this one and I'm really satisfied with the ending results.
© This content is originally made by @tonac