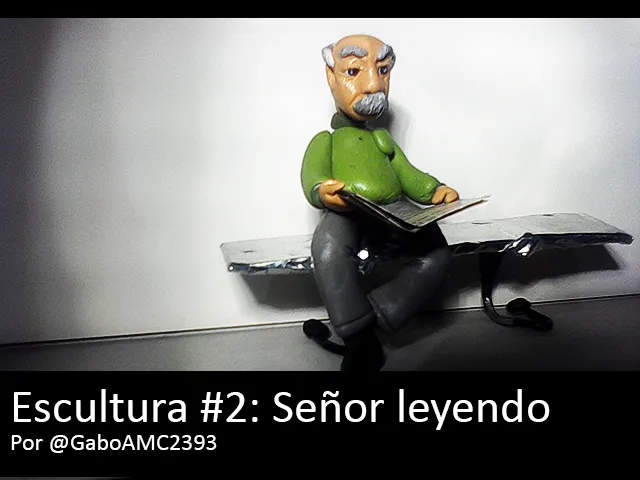
¡Saludos a todos! Hace cierto tiempo, le pregunté a la amiga @paolasatenea si podría hacer una escultura basada en su cuadro teatral llamado "Obituario". Su respuesta fue afirmativa, así que de eso tratará la publicación que hoy nos ocupa, una escultura que representa a uno de los actores de su breve escena teatral.
Si no has leído la publicación en cuestión (Obituario), te invito a hacerlo siguiendo este enlace:
@paolasatenea/esp-obituario
Dicho todo lo anterior, ¡Comencemos!
Los materiales que utilicé fueron los siguientes:
- Plastilina.
- Palillos de madera.
- Alambre.
- Papel de aluminio.
- Paletas de madera (como las de los helados).
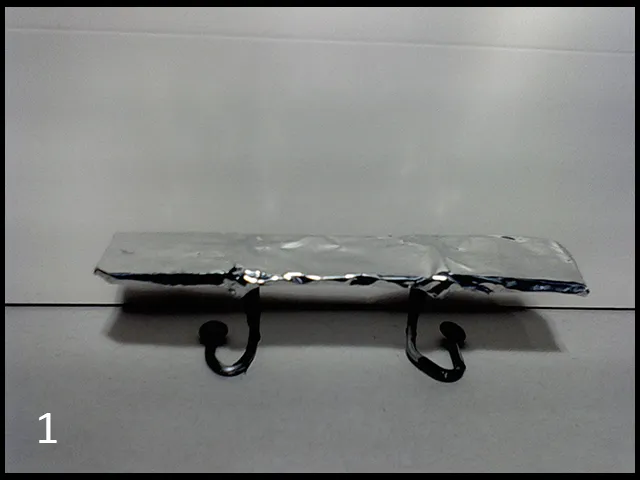
Estos tres últimos, alambre, papel de aluminio y paletas, los utilicé para hacer un pequeño banquillo de metro donde sentaría a nuestro anciano:
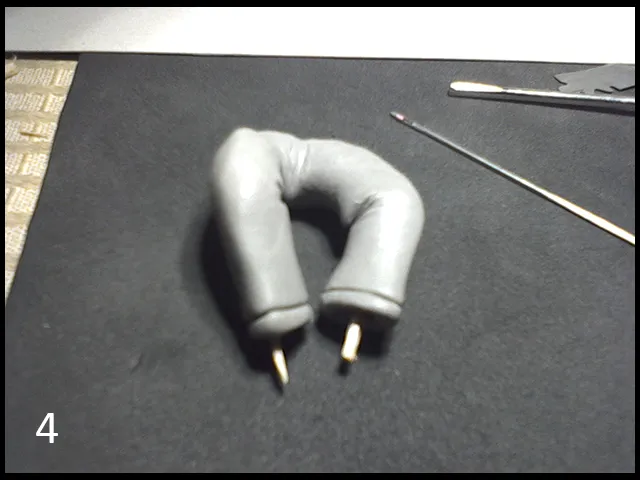
Una vez hecho nuestra base, es decir, el banquillo, hay que hacer las piernas. Yo usé el color gris para el pantalón de nuestra figura:

A continuación le di forma, con ayuda de un palillo hice arrugas en los dobleces de la ropa y en la entrepierna.

Seguidamente, coloqué palillos en la base de las piernas para colocar los tobillos y los zapatos.
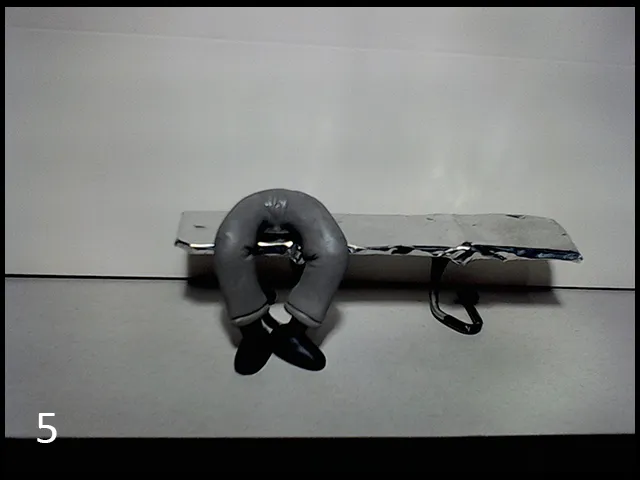
Una vez terminado los tobillos, los zapatos y las piernas, las senté en nuestro banquillo, dándole a las piernas la posición deseada. Lo bueno de este tipo de material es que no se seca y puedes seguir ajustando la posición de la figura después de haberla hecho.
Muy importante, hay que colocarle un palillo en la cintura a nuestra figura, como base para la parte superior.

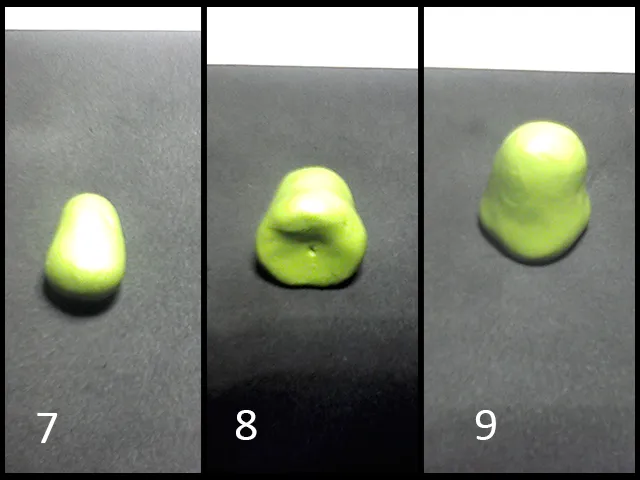
Una vez terminada la parte inferiora, pasamos a la parte superior, es decir, el torso, los brazos y la cabeza; comencemos con el torso. Yo elegí un color verde parecido al verde oliva, para vestir a nuestro anciano con un suéter. Para hacerlo comencé a darle forma de pera y continué moldeando hasta lograr la forma deseada.
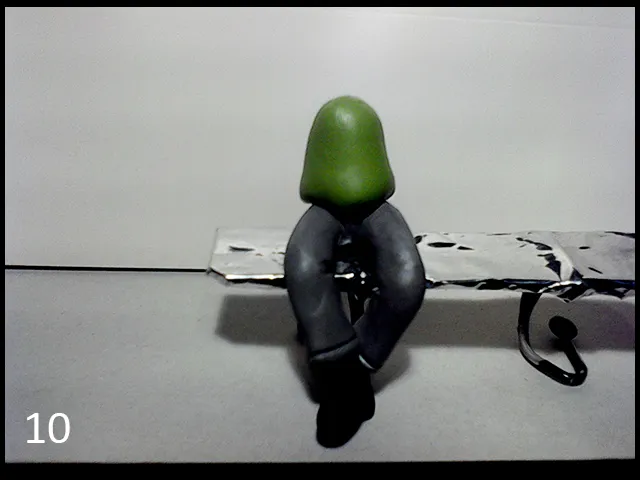
¿Recuerdan el palillo que habíamos colocado en la cintura de la figura? Pues bien, en ese palillo clavaremos el torso verde para fijarlo.
Lo siguiente será hacer los bracitos como pepinos, mangas pequeñas como tortillas, y colocarle las manitos. Como nota importante, en cada conexión (hombros, muñecas), hay que colocar palillos para sujetar bien las distintas partes de nuestra figura.

Si leyeron la historia, se habrán dado cuenta que el señor tenía un diario, o periódico; por lo tanto, había que hacerle uno. Yo simplemente tomé recortes viejos de revistas, las doblé y las pegué. Luego les hice un doblez al papel y lo adherí con pegamento a las manos de la figura.

Cabe destacar que hay momentos en los que olvidé tomar fotos por haberme concentrado tanto en el modelado de la figura, así que hay momentos en que no registré la realización de algunos pasos. Por ejemplo, al momento del modelado de la cabeza, no tomé algunas fotos, pero si del resultado obtenido.
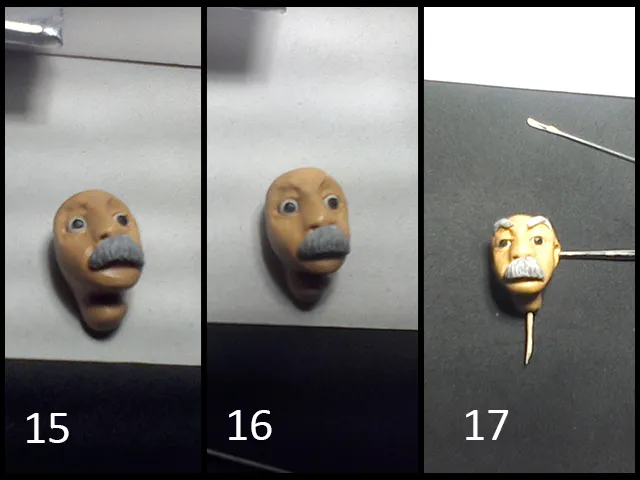
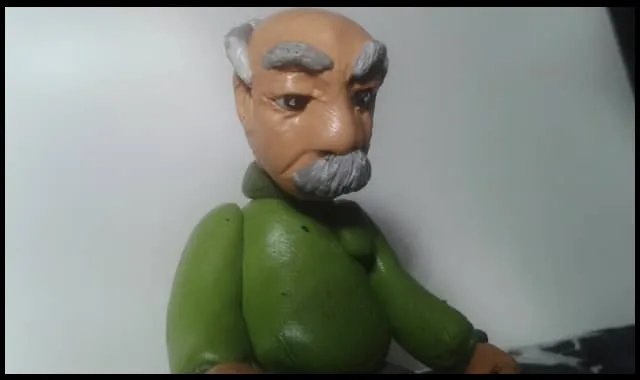
A continuación se muestra la cabeza con los ojos, nariz y bigote (15). Seguidamente, hago el moldeado de las arrugas en los ojos y el entrecejo (16), finalmente le coloco los párpados, las cejas y las orejas (17). Además, hay que clavarle un palillo en el cuello para sujetarlo del torso que ya hicimos.
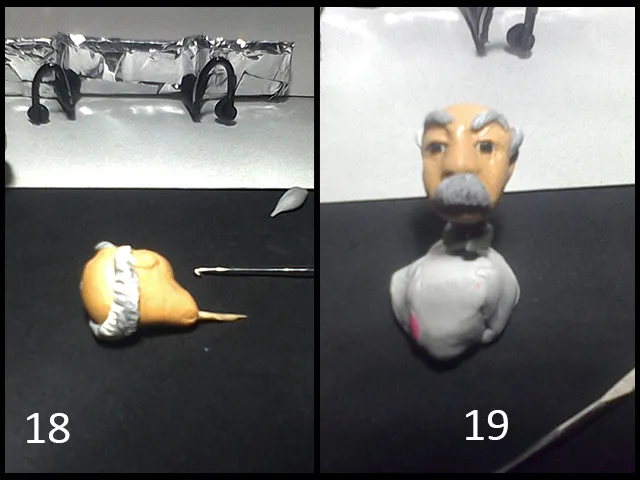
Continuamos con el moldeado de la cabeza, dándole forma a la calva y colocándole la corona de cabello (18). Después hacemos el cuello del suéter y lo colocamos alrededor del cuello de la figura (19).
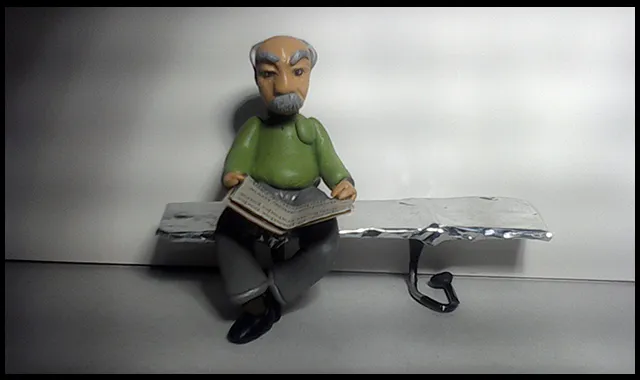
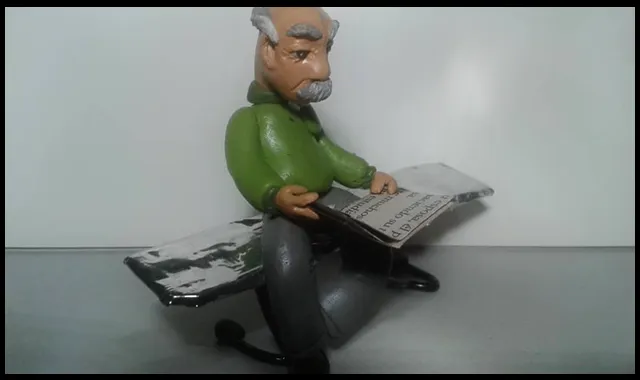
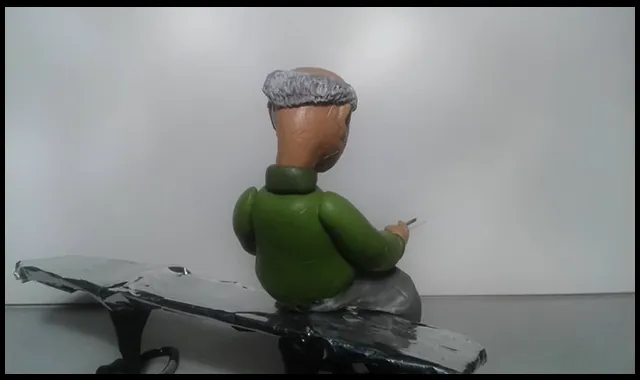
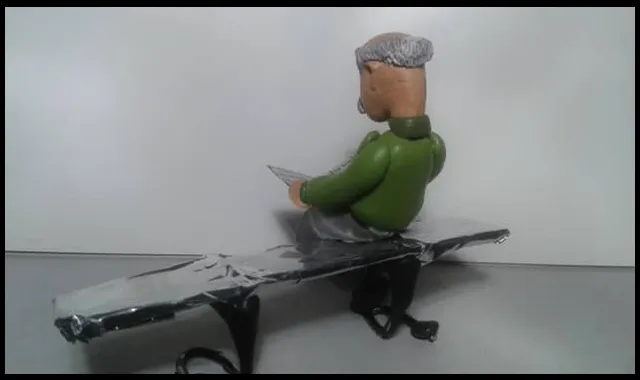
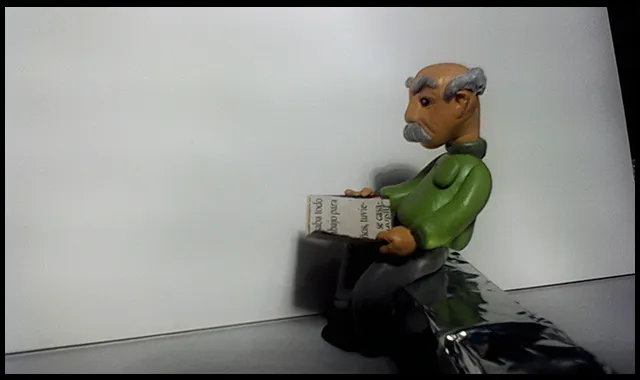
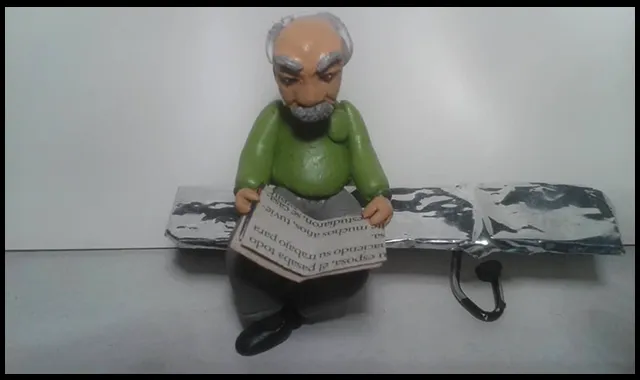
Lo último por hacer es clavar la cabeza ya terminada en el torso y la figura estará listo. Dejo unas cuantas fotos del resultado para que vean la figura desde distintos ángulos:
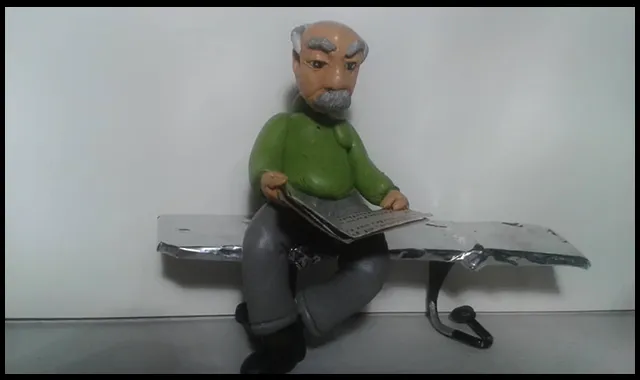
Y ya está, ¿qué les ha parecido la figura? Tardé casi un día entero en hacerla y el resultado de verdad que me ha gustado. Me encantaría saber su opinión sobre la figura, así que no duden en dejarme sus comentarios.
Como aclaratoria, esta es la primera de dos figuras que haré basándome en el cuadro teatral mencionado al comienzo, así que pronto estaré publicando la figura que acompañará a nuestro lector del diario. Antes de terminar, un saludo a la amiga @paolasatenea, a quien agradezco mucho por haberme permitido hacer esta escultura inspirada en su historia.
¿Eres pintor, dibujante o escritor? ¿Te gustaría que hiciese una escultura basada en tu obra? No dudes en contactarme, estaré encantado de convertir tu personaje/obra en una escultura. Sin más que agregar, me despido entonces...
¡Hasta la próxima!
*****English Version*****
Greetings to all! Some time ago, I asked friend @paolasatenea if I could make a sculpture based on her theatrical painting called "Obituario". Her answer was yes, so that's what today's post will be about, a sculpture representing one of the actors in her short theatrical scene.
If you have not read the publication in question (Obituary), I invite you to do so by following this link:
@paolasatenea/esp-obituario
With all of the above said, let's get started!
The materials I used were the following:
- Plasticine.
- Wooden sticks.
- Wire.
- Aluminum foil.
- Wooden popsicle sticks (like the ice cream ones).
These last three, wire, aluminum foil and popsicle sticks, I used to make a small subway stool for our old man to sit on:
Once we have made our base, that is, the bench, we have to make the legs. I used gray color for the pants of our figure:
Then I shaped it, using a toothpick I made wrinkles in the folds of the clothes and in the crotch.
Next, I placed toothpicks at the base of the legs to attach the ankles and shoes.
Once the ankles, shoes and legs were finished, I sat them on our stool, giving the legs the desired position. The nice thing about this type of material is that it doesn't dry out and you can keep adjusting the position of the figure after you've done it.
Very important, we must place a stick at the waist to our figure, as a base for the upper part.
Once the lower part is finished, we move on to the upper part, that is, the torso, arms and head; let's start with the torso. I chose a green color similar to olive green, to dress our old man with a sweater. To do this I started by shaping it into a pear shape and continued shaping it until the desired shape was achieved.
Remember the toothpick that we had placed in the waist of the figure? Well, we will stick the green torso on that stick to fix it.
The next step is to make the little arms like cucumbers, small sleeves like tortillas, and place the little hands. As an important note, in each connection (shoulders, wrists), you have to place toothpicks to hold well the different parts of our figure.
If you read the story, you may have noticed that the man had a newspaper, or journal; therefore, one had to be made. I simply took old magazine clippings, folded them and glued them together. Then I made a fold in the paper and glued it to the figure's hands.
It should be noted that there are times when I forgot to take pictures because I was concentrating so much on the modeling of the figure, so there are times when I did not record the completion of some steps. For example, at the moment of modeling the head, I did not take some pictures, but I did take pictures of the result obtained.
Next, the head is shown with the eyes, nose and mustache (15). Next, I mold the wrinkles in the eyes and between the eyebrows (16), and finally I place the eyelids, eyebrows and ears (17). In addition, we have to stick a stick in the neck to hold it from the torso that we have already made.
We continue with the molding of the head, shaping the bald head and placing the crown of hair (18). Then we make the neck of the sweater and place it around the neck of the figure (19).
The last thing to do is to nail the finished head to the torso and the figure will be ready. I leave a few photos of the result so you can see the figure from different angles:
And that's it, what do you think of the figure? It took me almost a whole day to make it and I really liked the result. I would love to know your opinion about the figure, so don't hesitate to leave me your comments.
As a clarification, this is the first of two figures that I will make based on the theatrical painting mentioned at the beginning, so soon I will be publishing the figure that will accompany our diary reader. Before I finish, a greeting to my friend @paolasatenea, whom I thank very much for allowing me to make this sculpture inspired by her story.
Are you a painter, cartoonist or writer? Would you like me to make a sculpture based on your work? Do not hesitate to contact me, I will be happy to turn your character/work into a sculpture. With nothing more to add, I'll say goodbye...
See you next time!

Imagenes editadas con Photoshop
Fotos tomadas con tablet HP stream 7
Photos edited with Photoshop
Photos taken with HP stream 7 tablet
Últimos tres post/Last three posts:
El naufragio del Irasema (Parte II)
Weekend of cats, books, antiques and food / Fin de semana de gatos, libros, antigüedades y comida
"Cooking Memories": The Terminal Redfish Contest / "Cocinando recuerdos": El concurso de la gallineta de la terminal