Hola amigos artistas.
Hello artist friends
Como a va su día?
Hoy en Cuba amanecimos mojados. Pero si llueve con sol, el calor no mejora.
Esta vez les traigo una máscara ilusión de Arlequín muy fácil de hacer.
How is your day going?
Today in Cuba we woke up wet. But if it rains with sunshine, the heat doesn't get any better.
This time I bring you an easy to make Harlequin illusion mask.
Con esta misma técnica podemos crear la máscara de lo que más nos guste, payasos, brujas, animales...lo que quieran.
Vamos allá!!
With this same technique we can create the mask of whatever we like, clowns, witches, animals...whatever you want.
Let's go there!
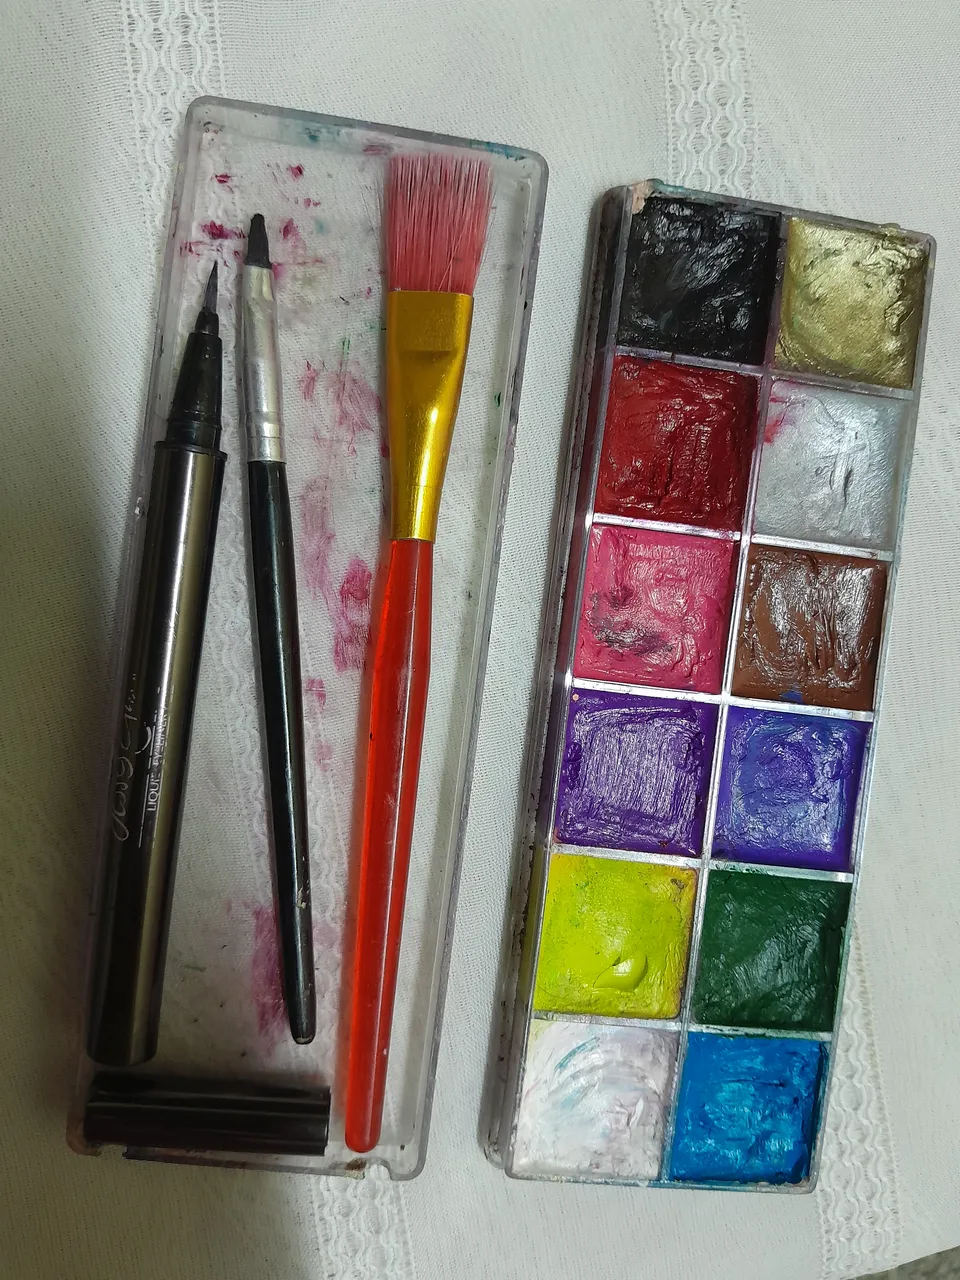
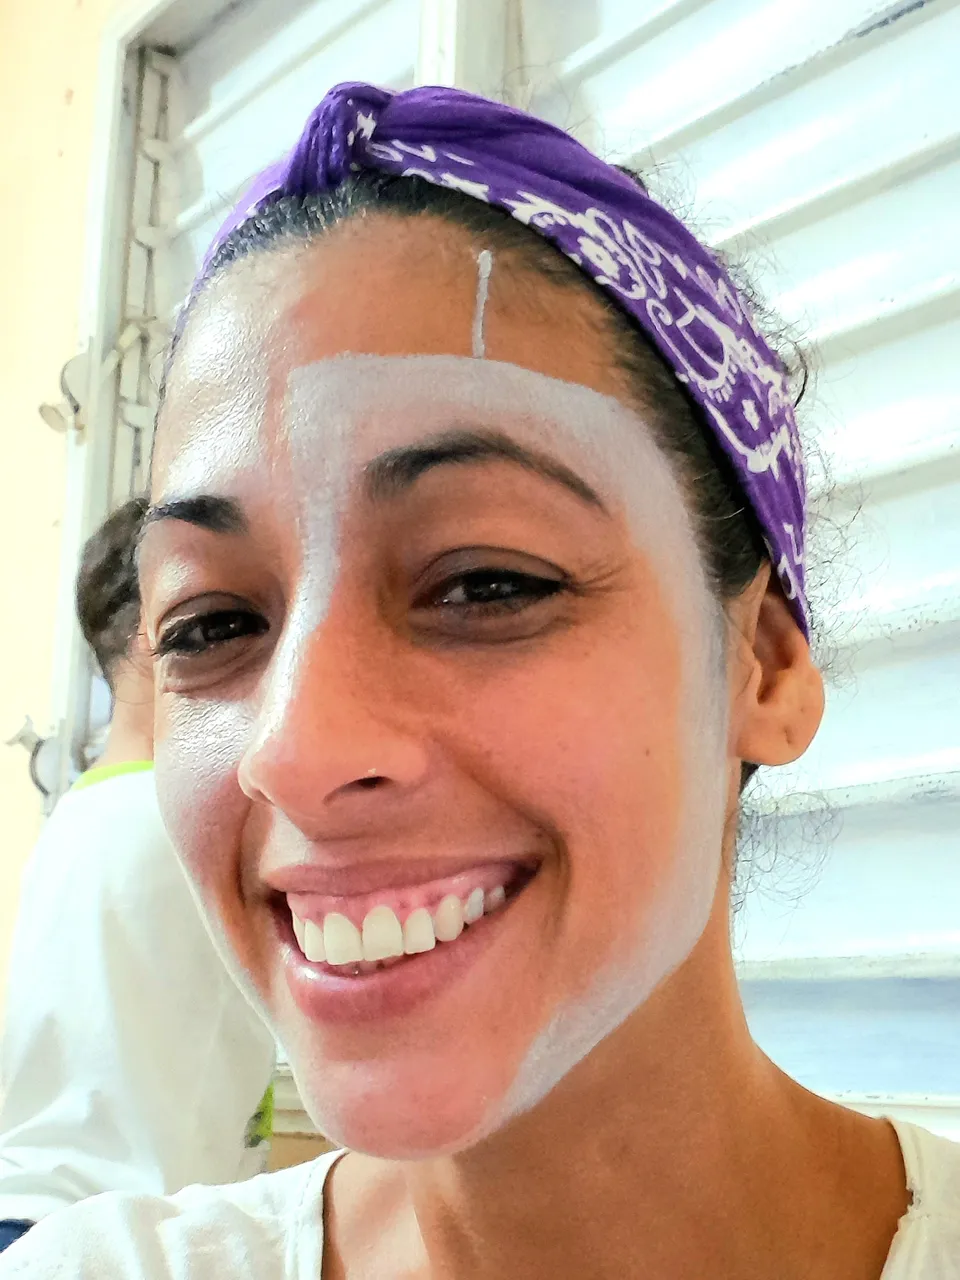
Materiales/Materials
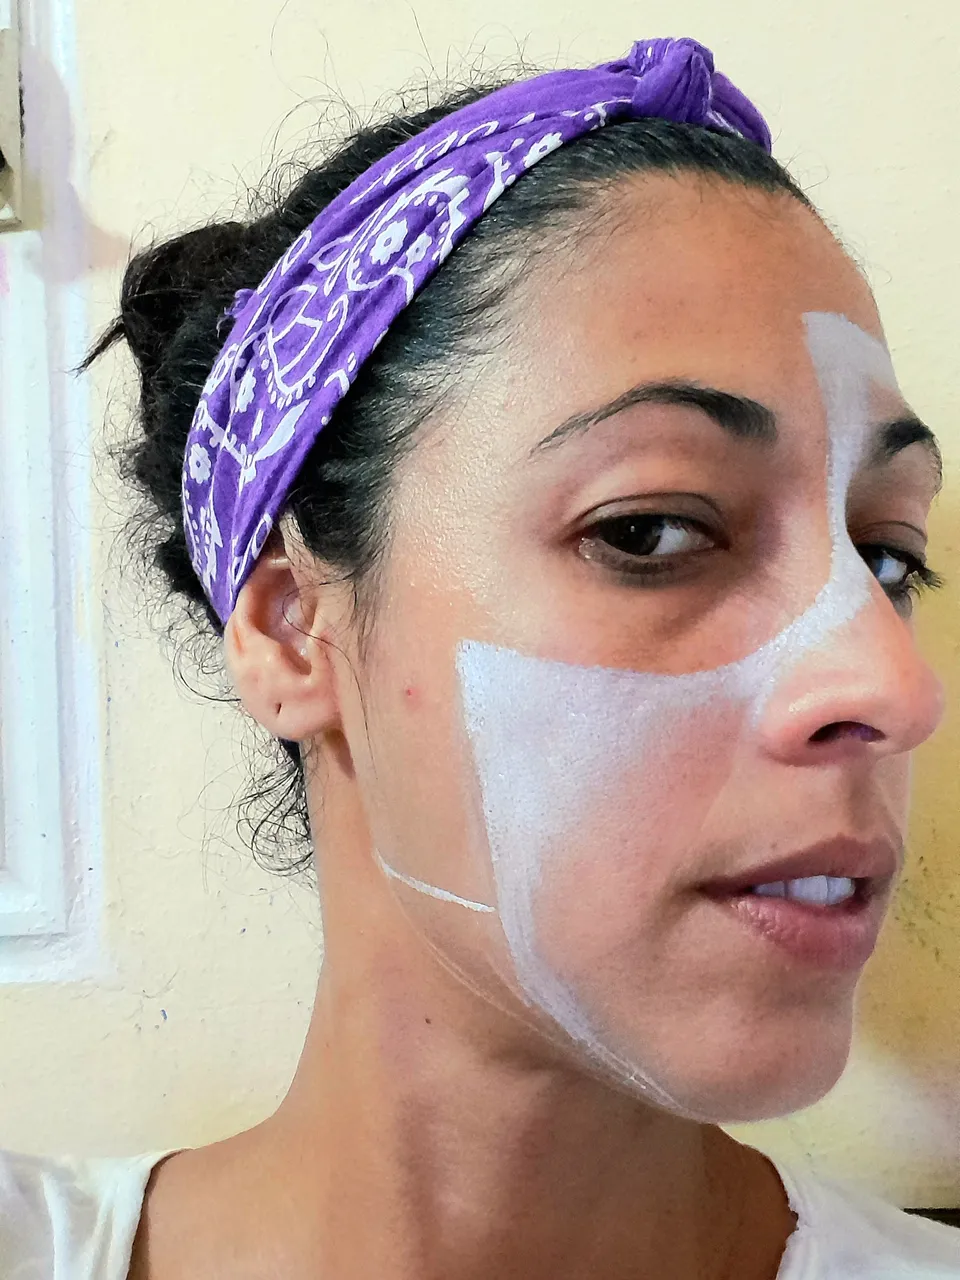
Paso 1/Step 1
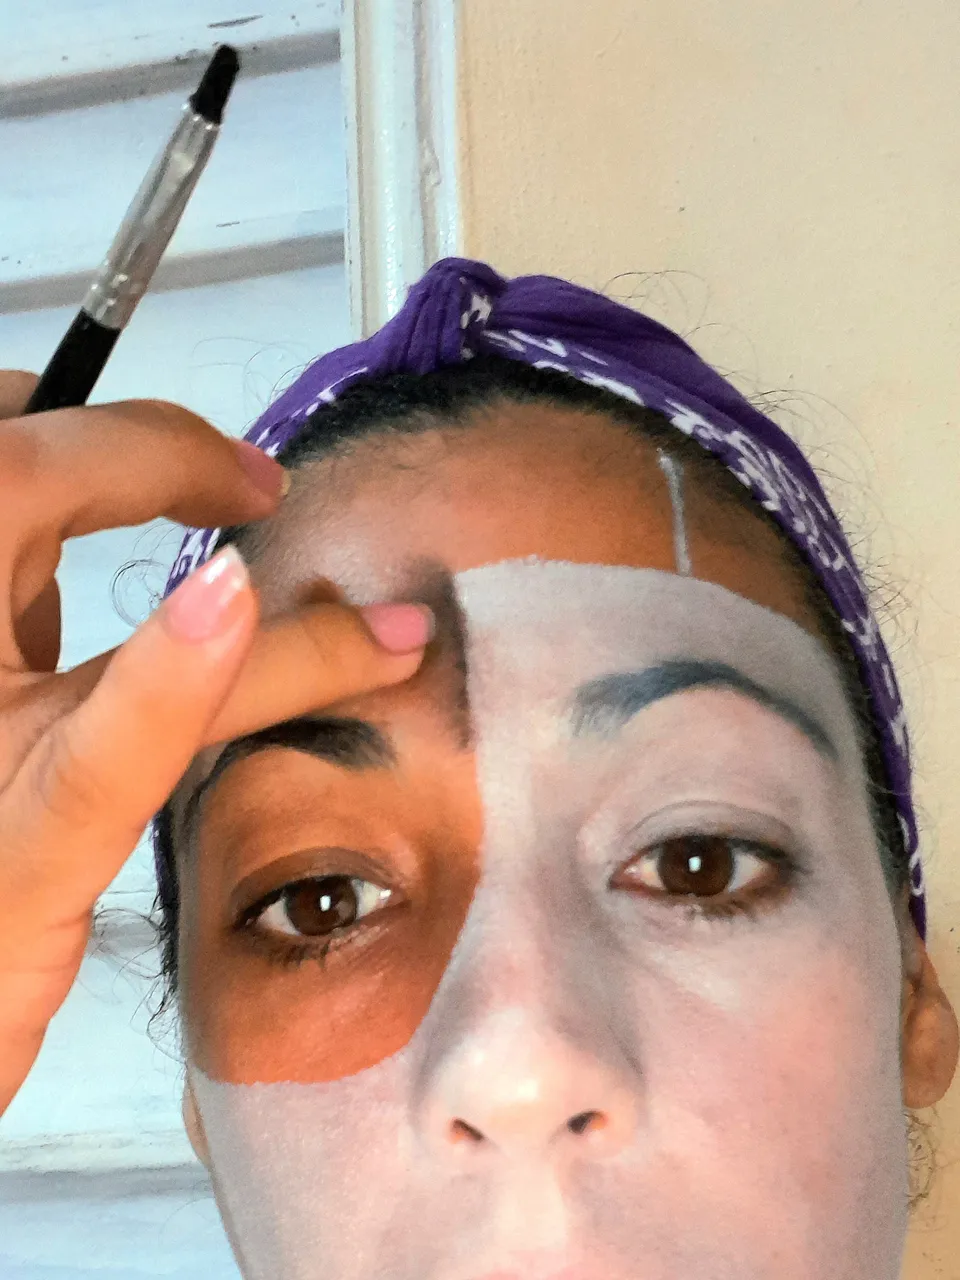
Marcamos con pincel fino todo el contorno de la máscara y rellenamos. Yo escogí un Arlequín pero ustedes deben rellenar dependiendo el color que será su máscara.
We mark with a fine brush all the contour of the mask and fill in. I chose a Harlequin but you should fill in depending on the color that will be your mask.
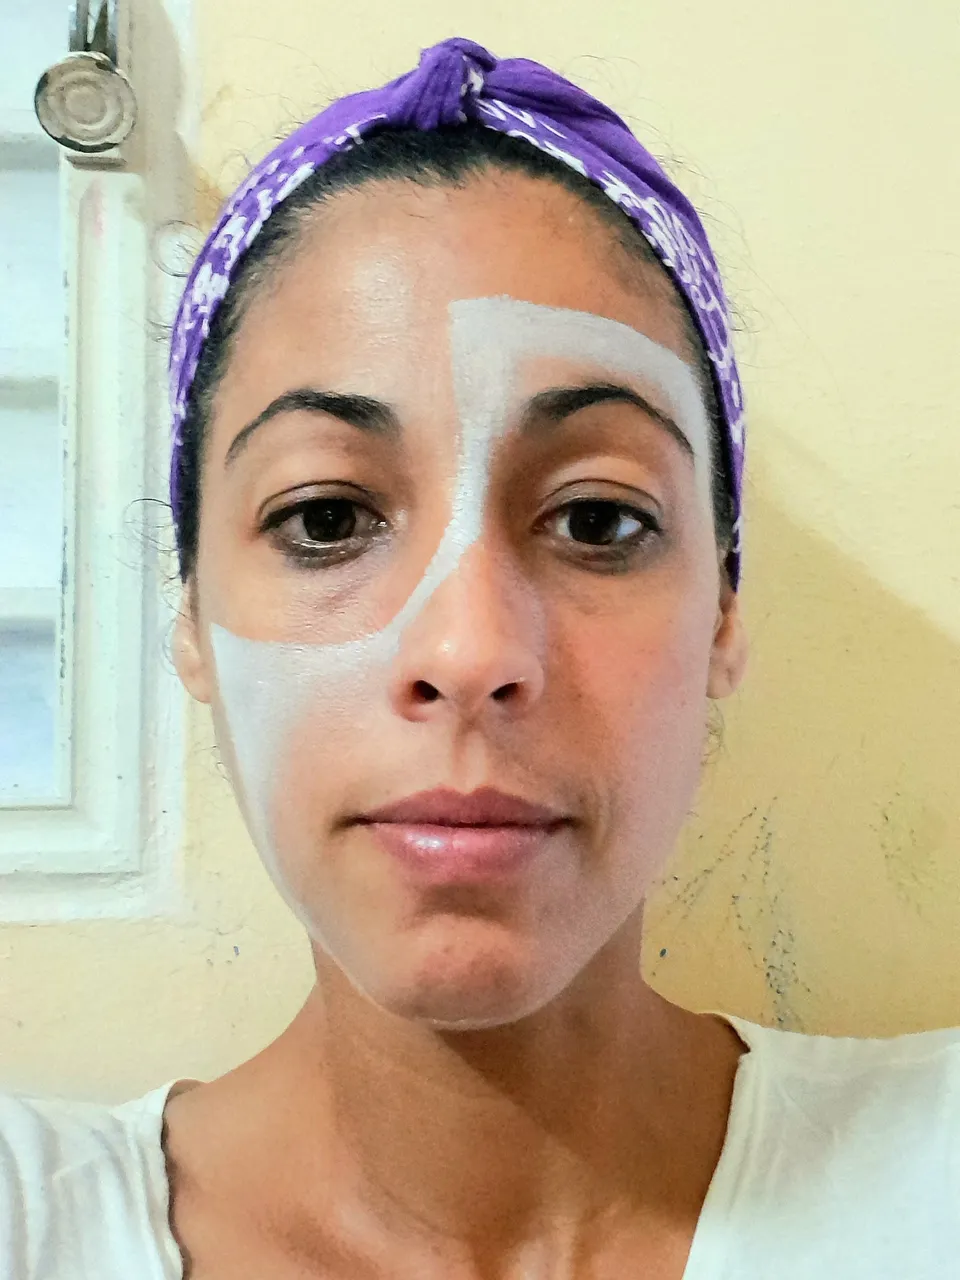
(Me disculpan el fondo pero mi niño me ha decorado la pared de atrás 🤷🏻♀️😅 )
(You'll excuse the background but my kid has decorated my back wall 🤷🏻♀️😅 )

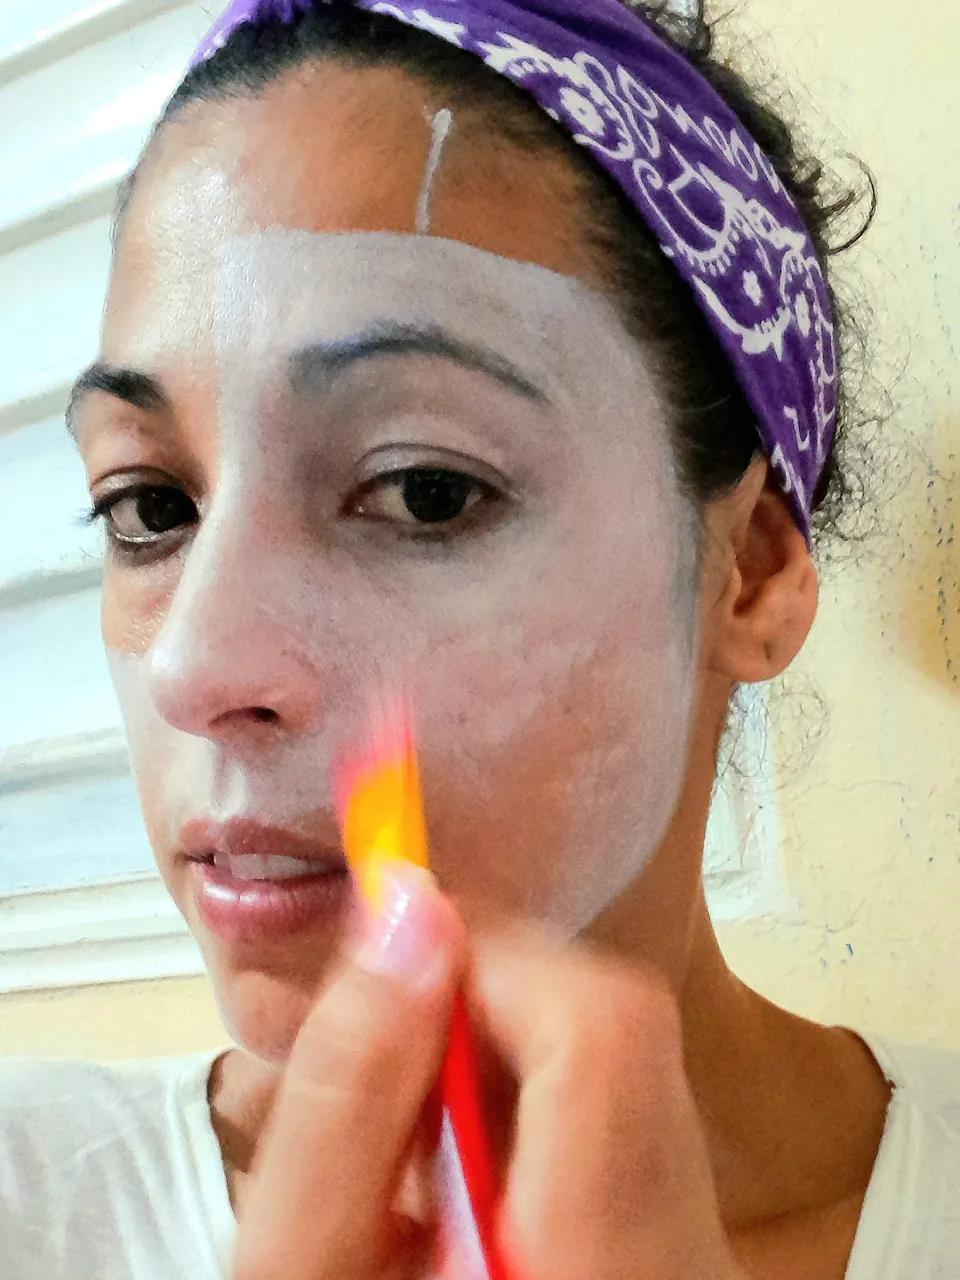
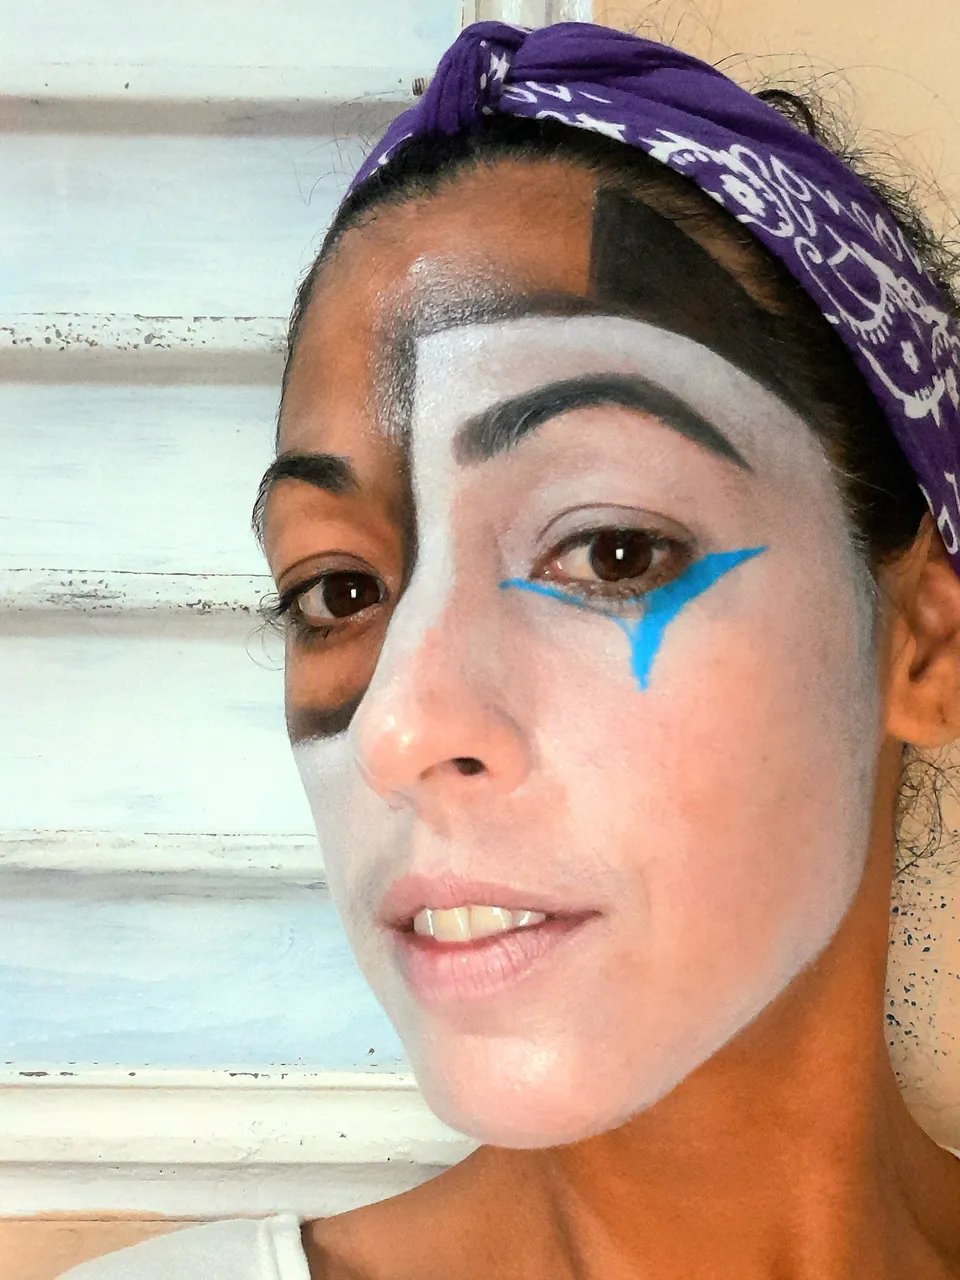
Rellenamos lo que sería la máscara de blanco, cuidado con el espacio parecido a un triangulo que hicimos anteriormente, mas tarde lo rellenaremos de negro.
We fill what would be the mask with white, be careful with the space similar to a triangle that we did before, later we will fill it with black.

Paso 2/Step 2
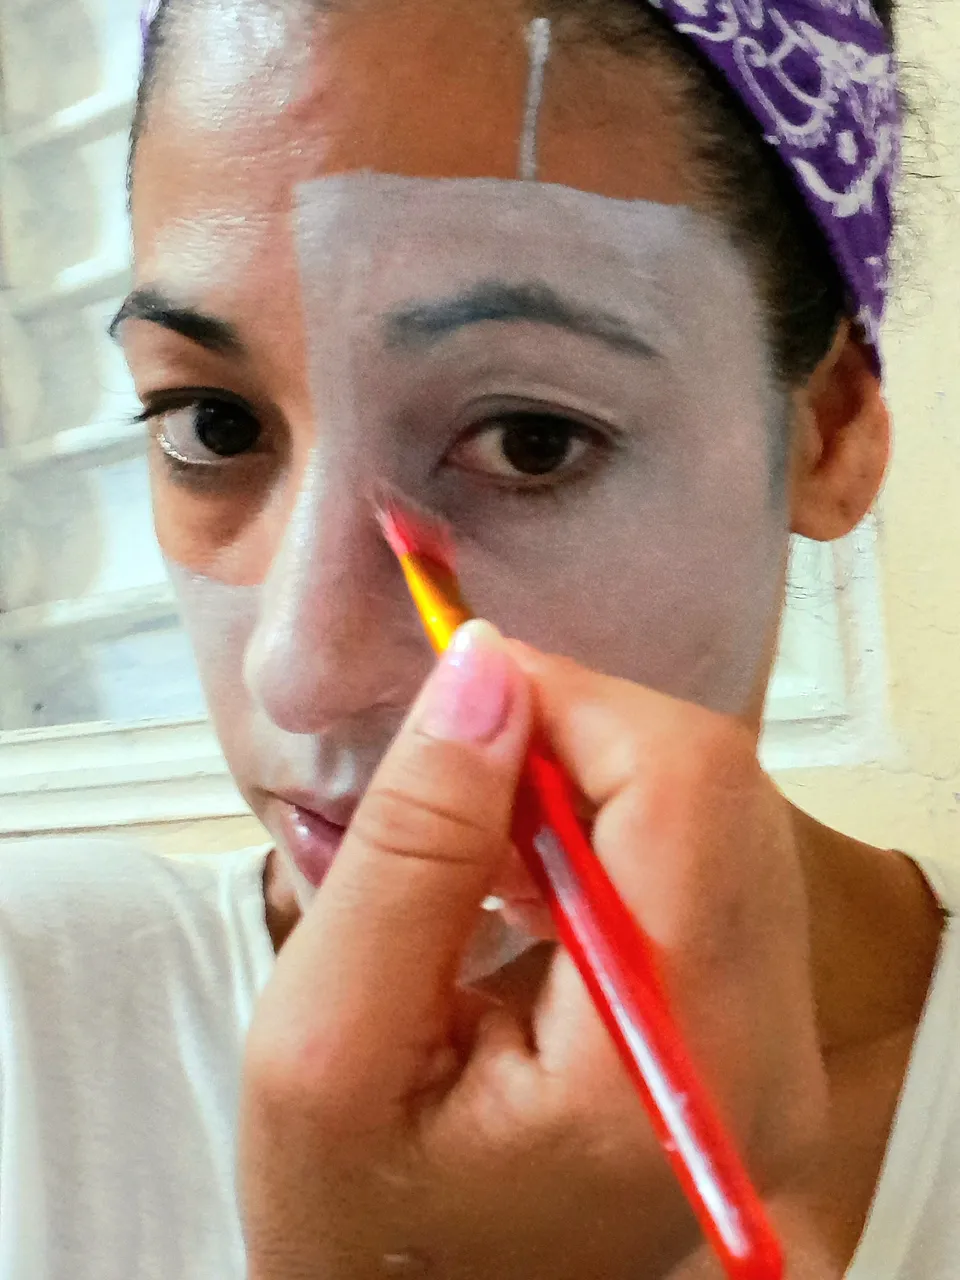
Marcamos en negro toda el contorno y difuminamos para lograr efecto sombra. Yo lo hago a golpecitos con el dedo.
We mark the entire contour in black and blend to achieve a shadow effect. I do it by tapping with my finger.
Estos colores que uso para la cara son bastante grasos, creo que para que la sombra hubiese quedado mejor debí usar una sombra en polvo, pero no tengo mis demás maquillaje a mano. Al final tuve que limpiar un poco porque se iba corriendo, es por eso que les aconsejo usar en polvo
These colors I use for the face are quite greasy, I think the shadow would have looked better if I had used a powder shadow, but I don't have my other makeup on hand. In the end I had to clean it up a bit because it was running off, that's why I advise you to use powder.
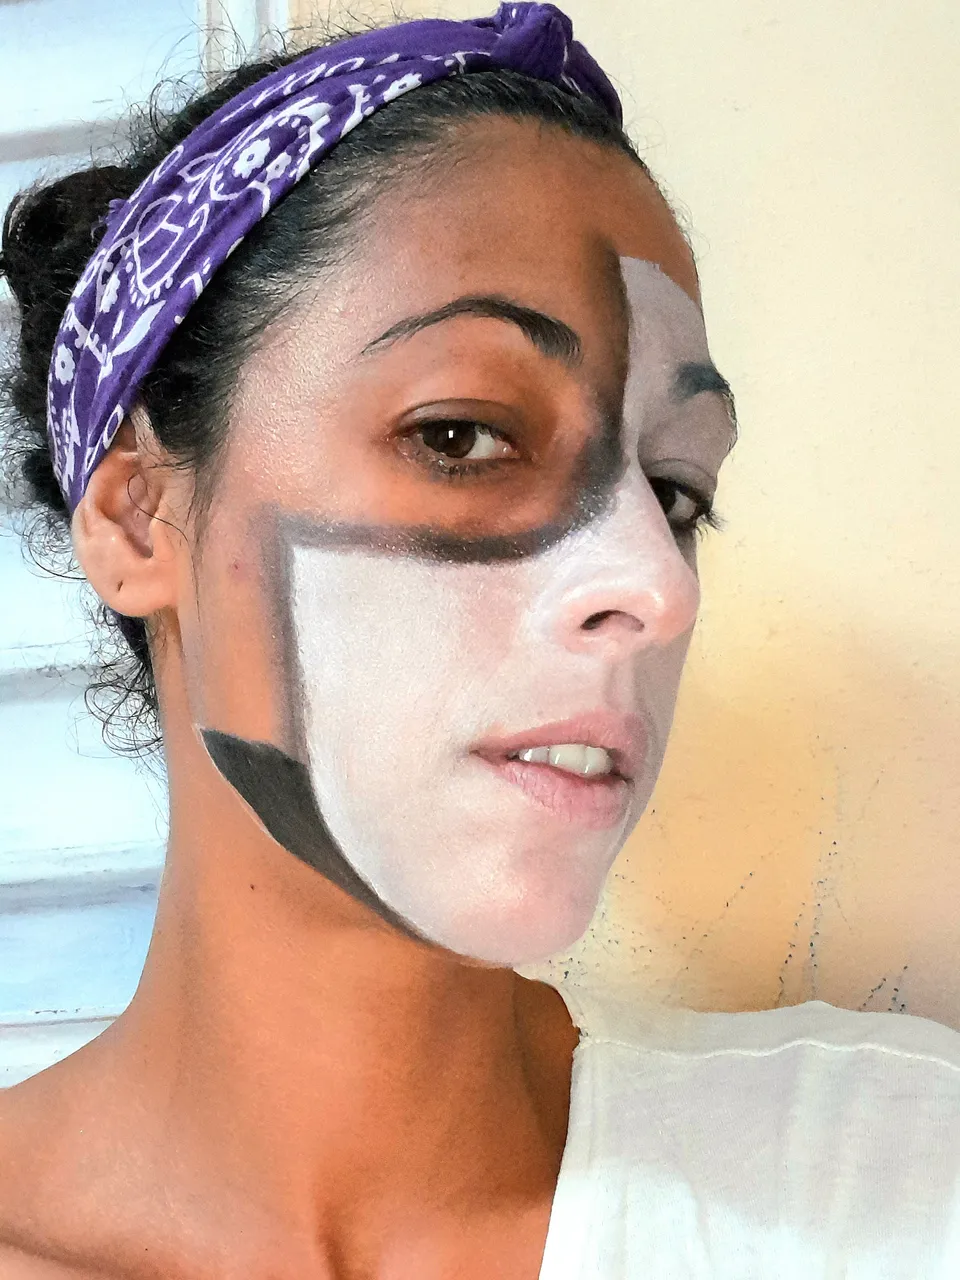
Recuerden rellenar también de negro los triángulos que hemos marcado al principio.
Remember to also fill in the triangles we marked at the beginning with black.

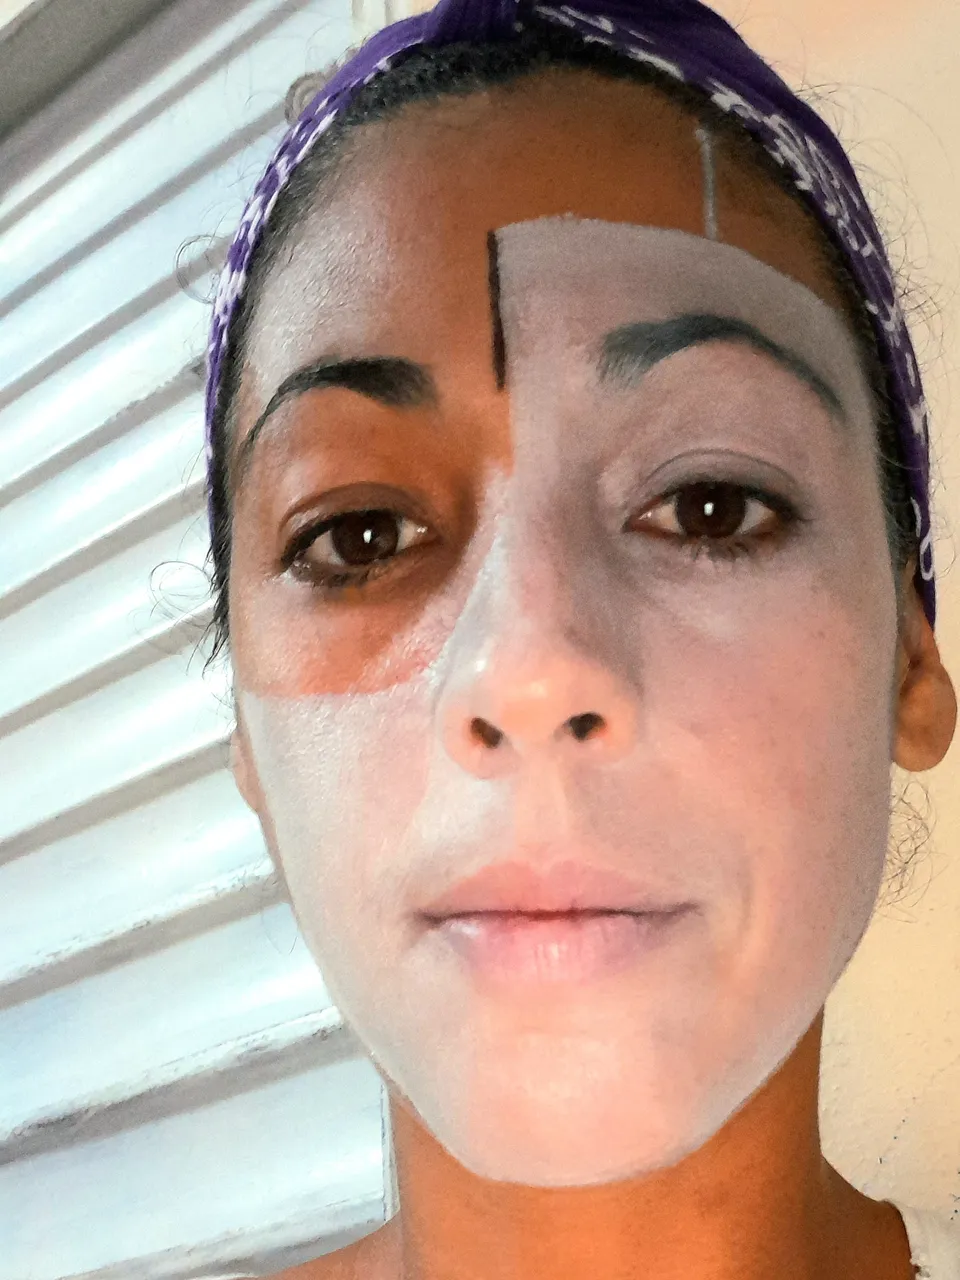
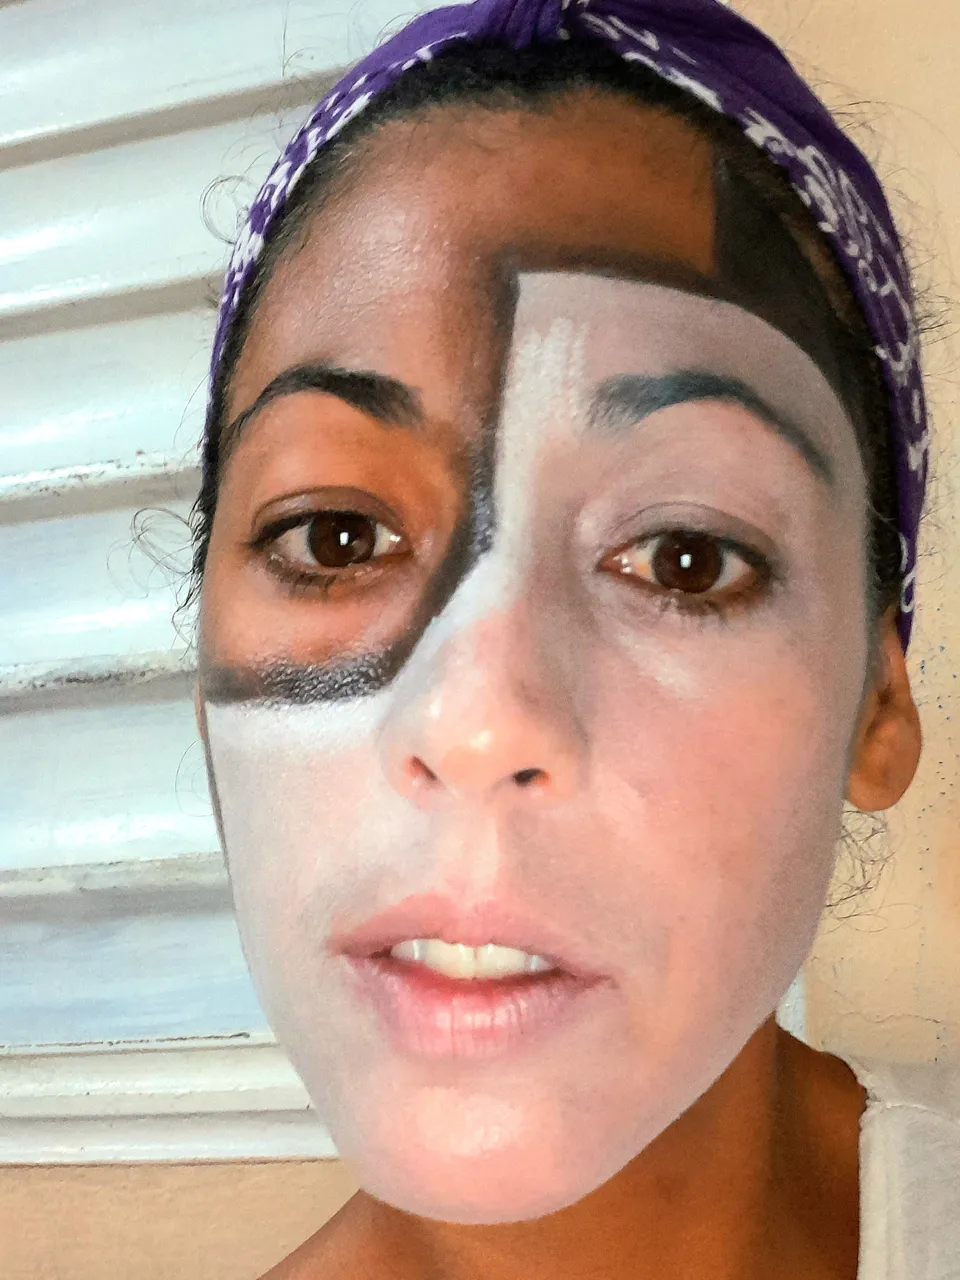
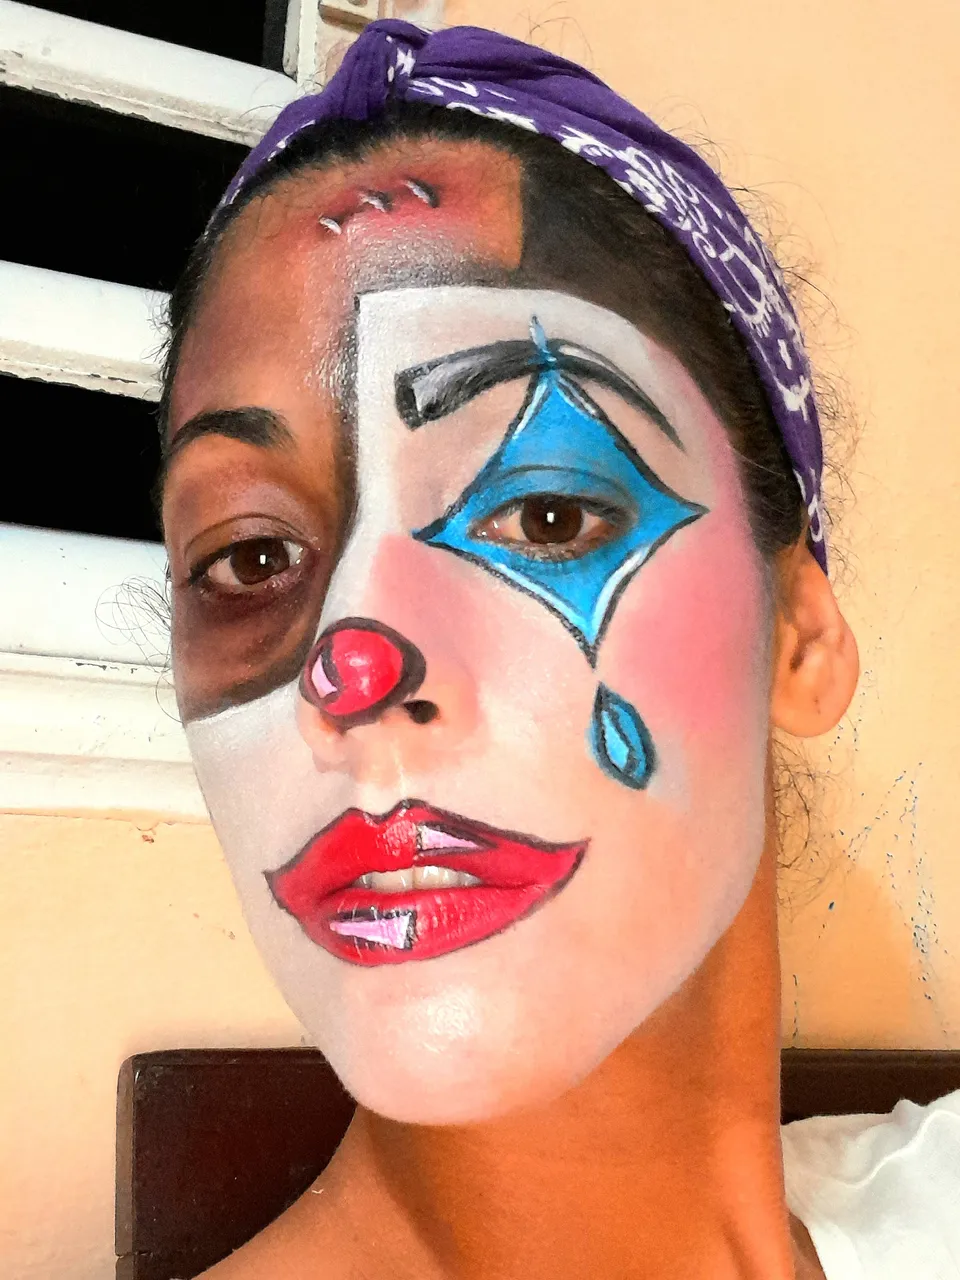
Debe ir quedando mas menos así.
It should look more or less like this.
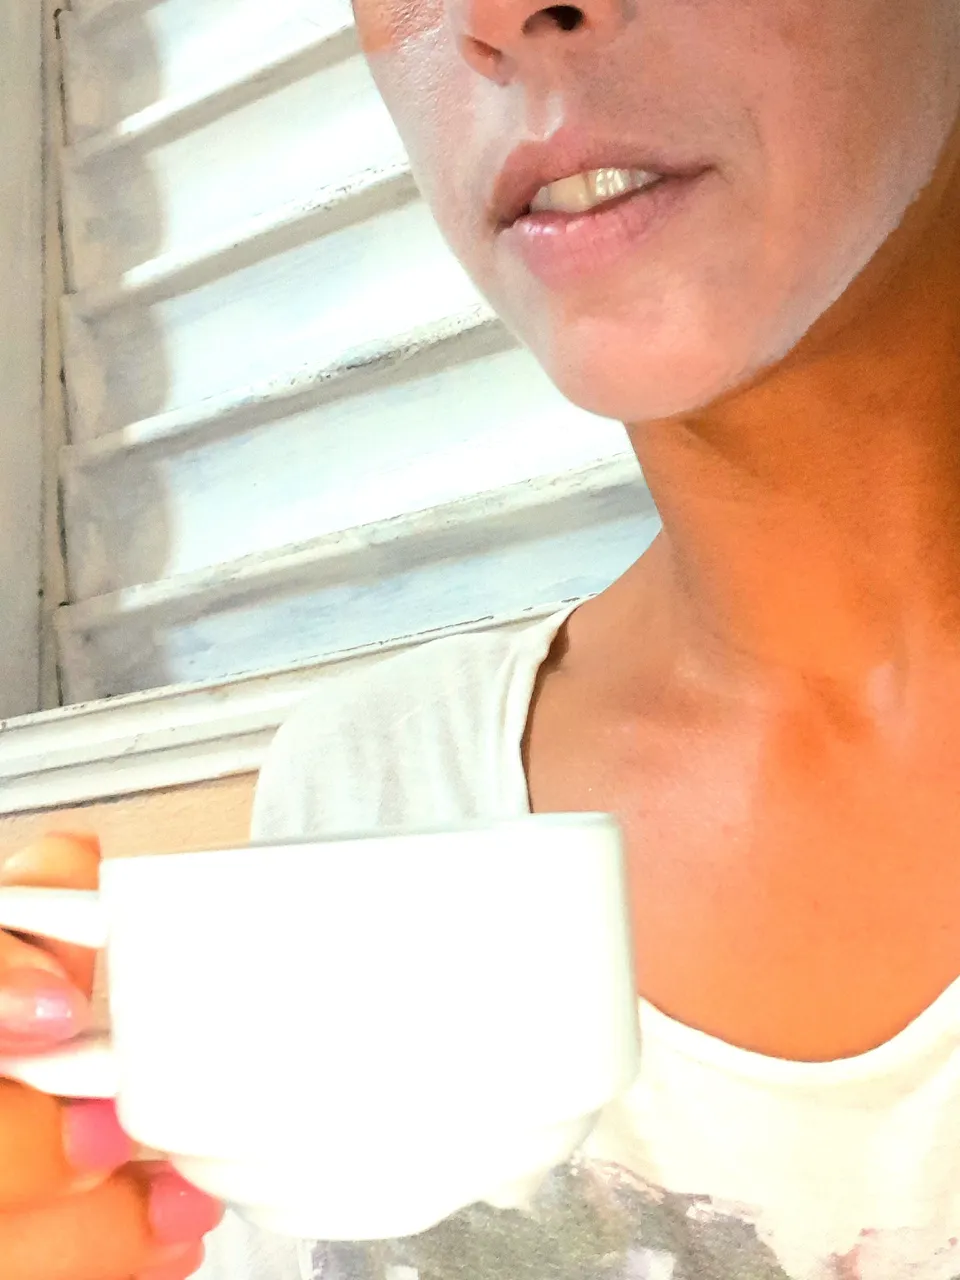
El cafecito de siempre 😊☕️ y continuamos.
The usual coffee 😊☕️ and we continue.
Paso 3/Step 3
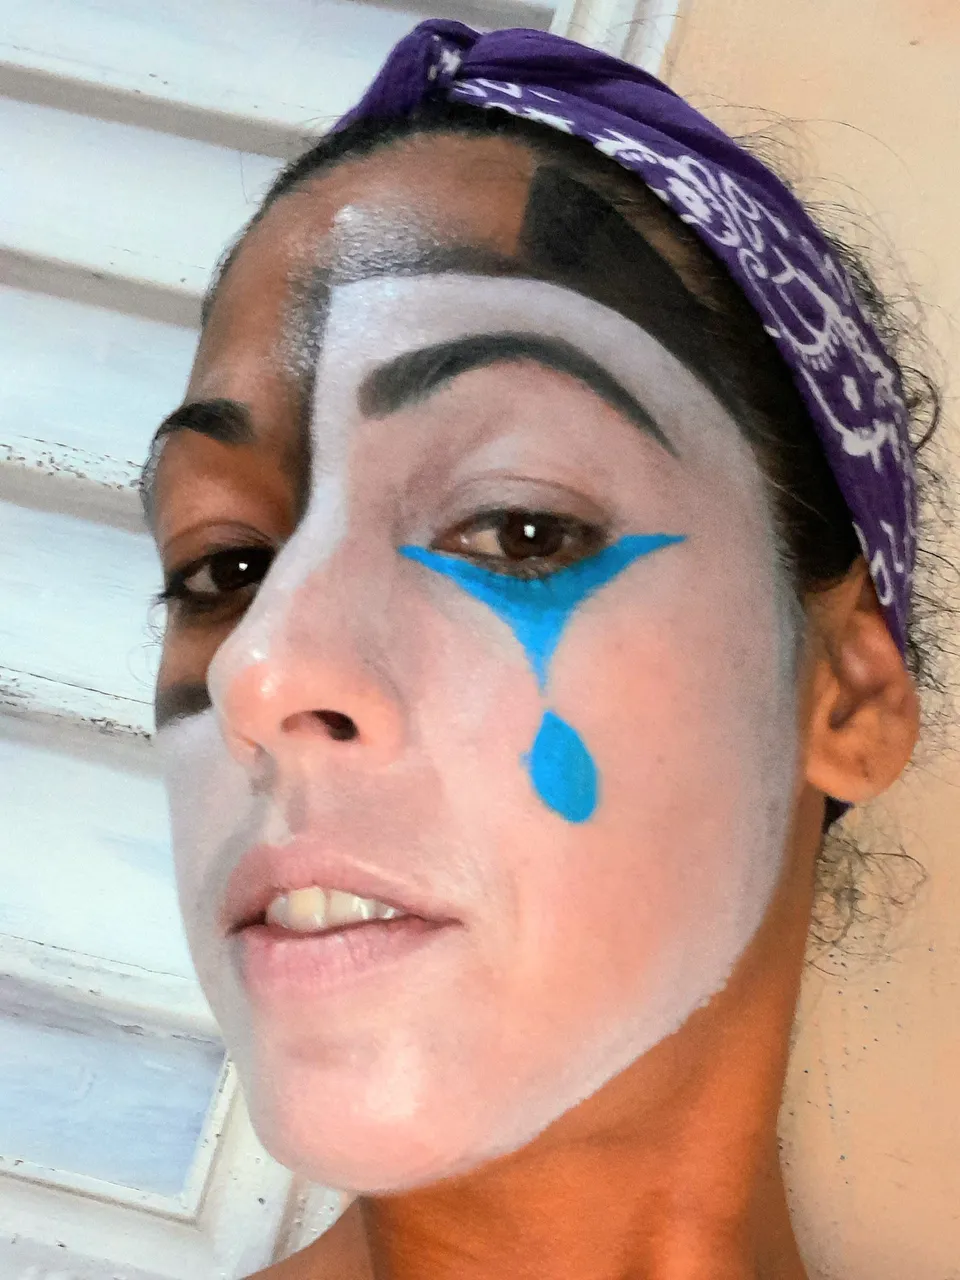
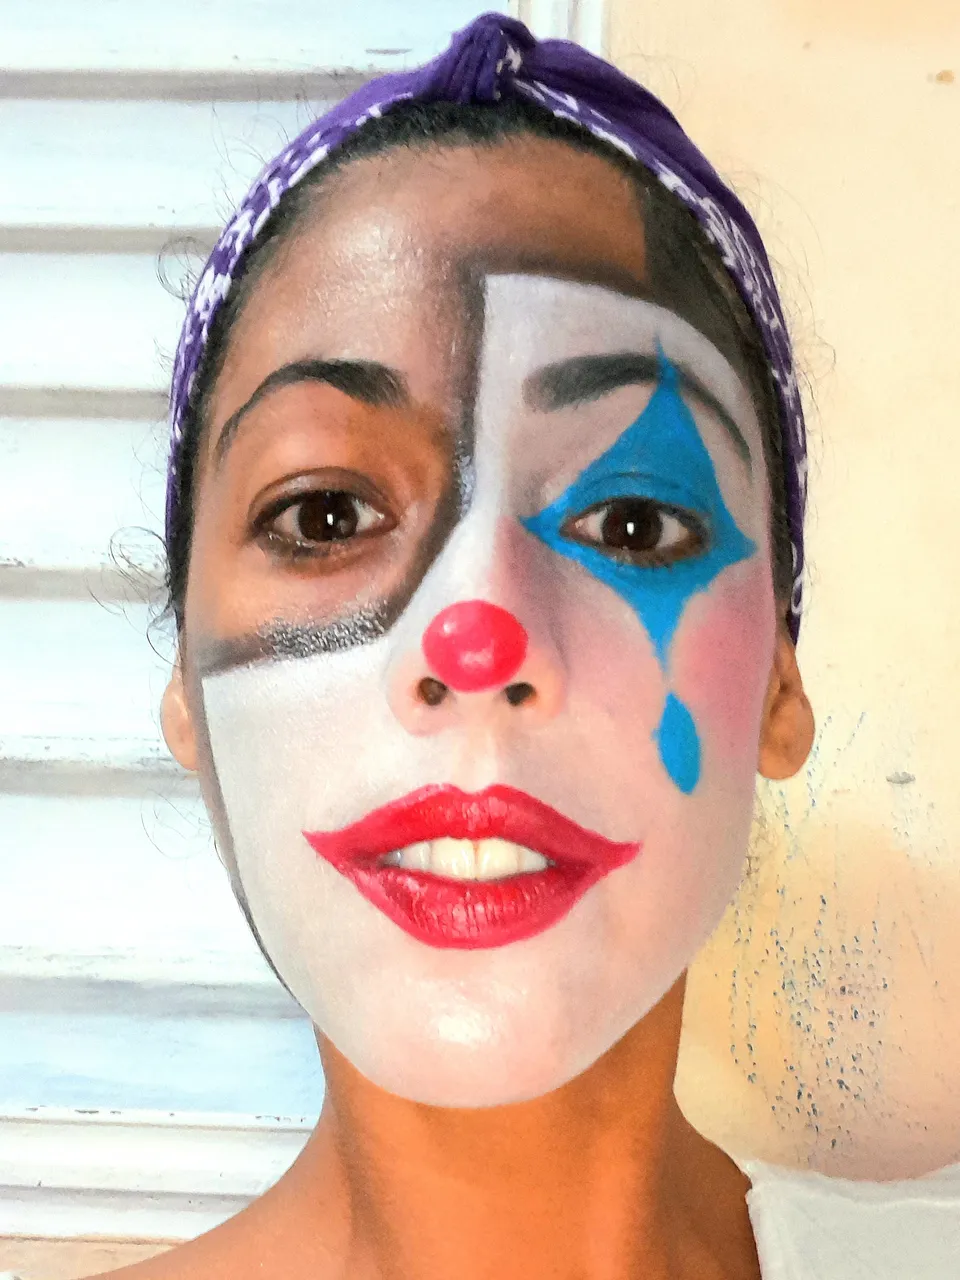
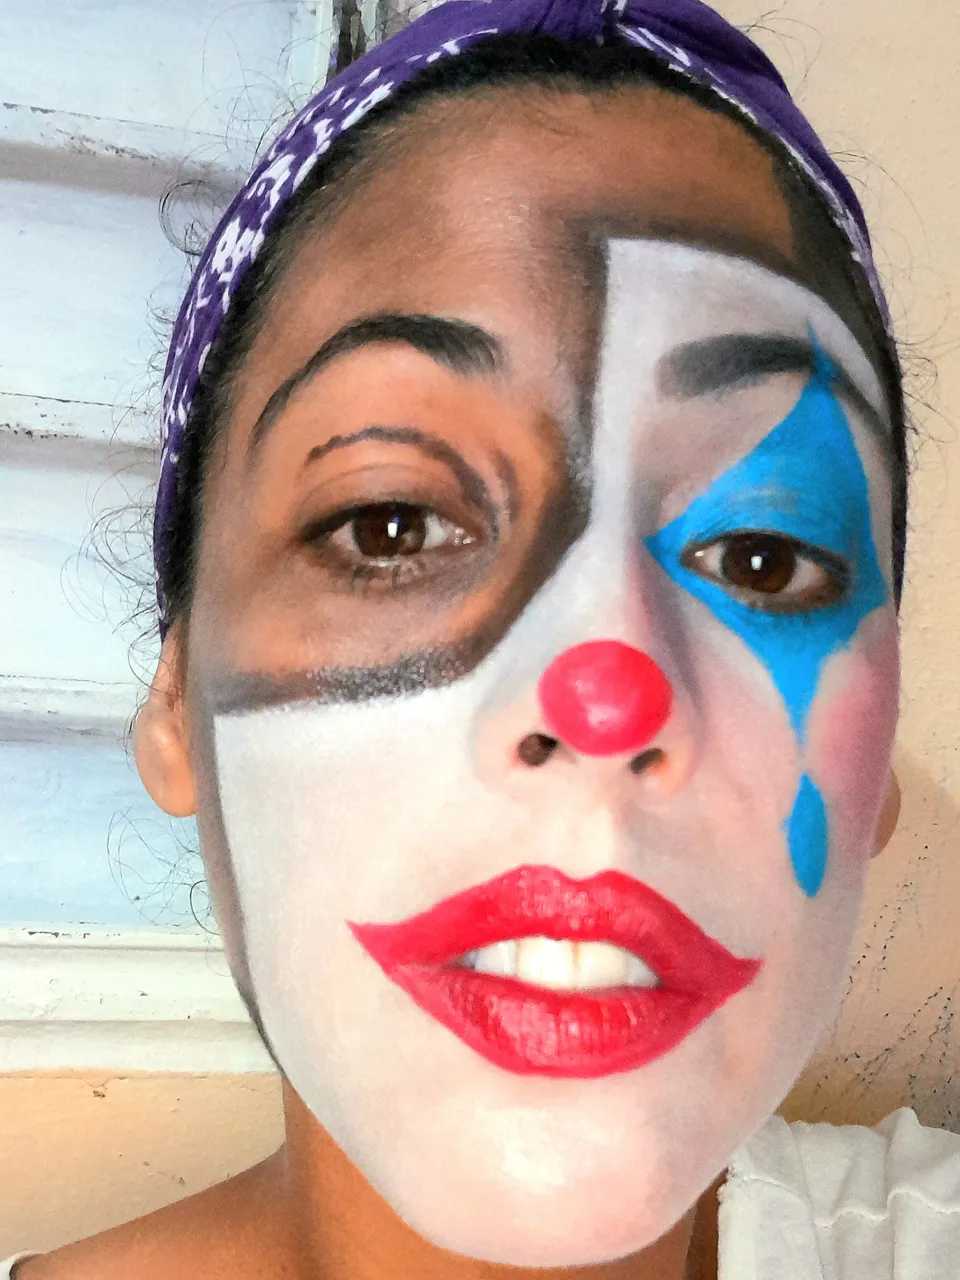
Pintamos la máscara. En mi caso un Arlequín bastante sencillo.
Empecé por darle un poco de forma a la ceja, pinté el triangulo del ojo en color azul, luego un poco se color rosa en pómulo y nariz. Este paso lo pueden intercambiar. Luego la boca bien llamativa y en la nariz solo un redondel
We paint the mask. In my case a pretty simple Harlequin.
I started by giving a little shape to the eyebrow, painted the eye triangle in blue, then a little pink on the cheekbone and nose. This step can be interchanged. Then the mouth is very striking and on the nose just a roundel.
Paso 4/Step 4
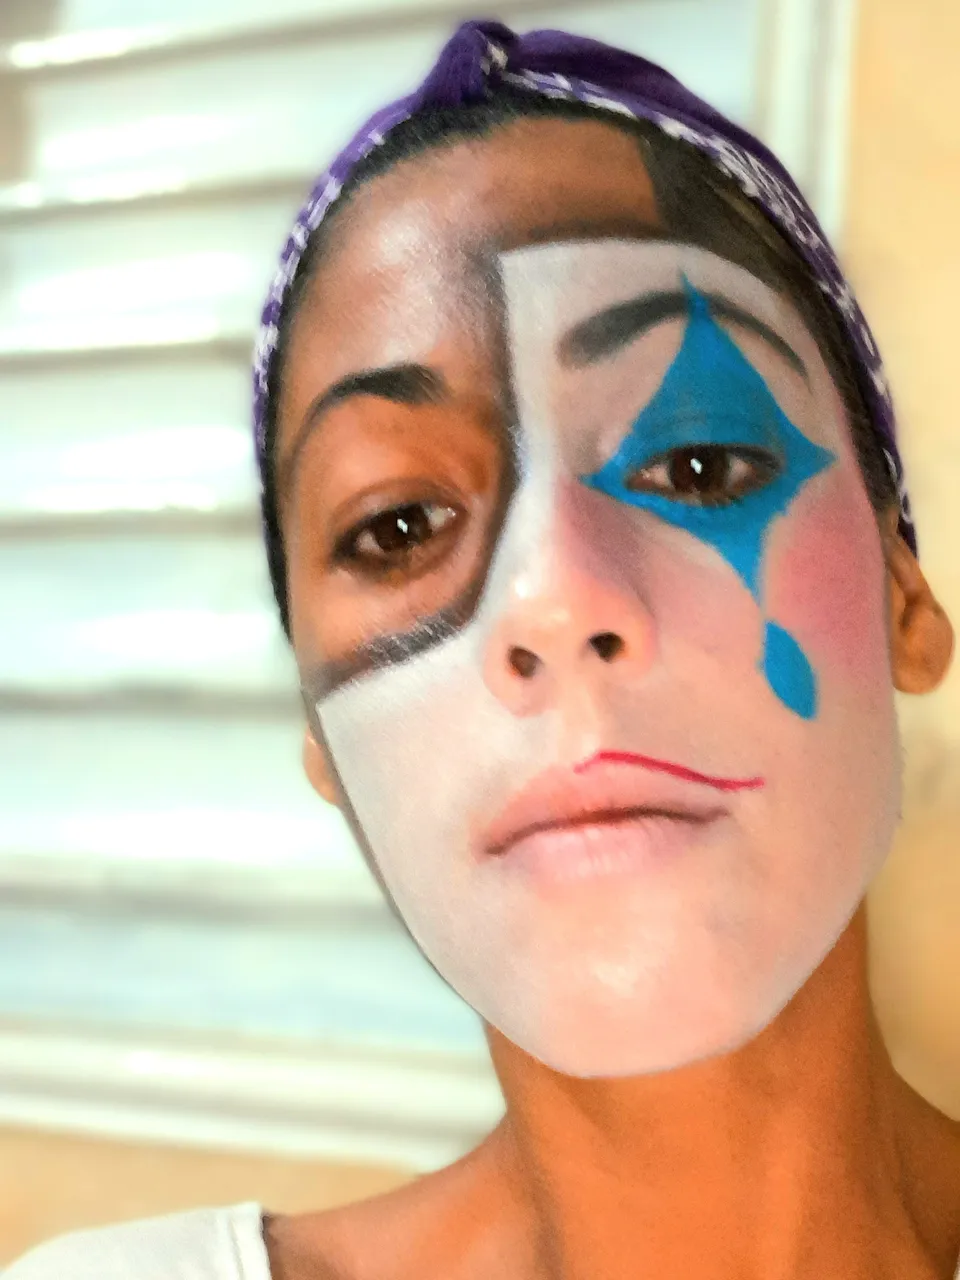
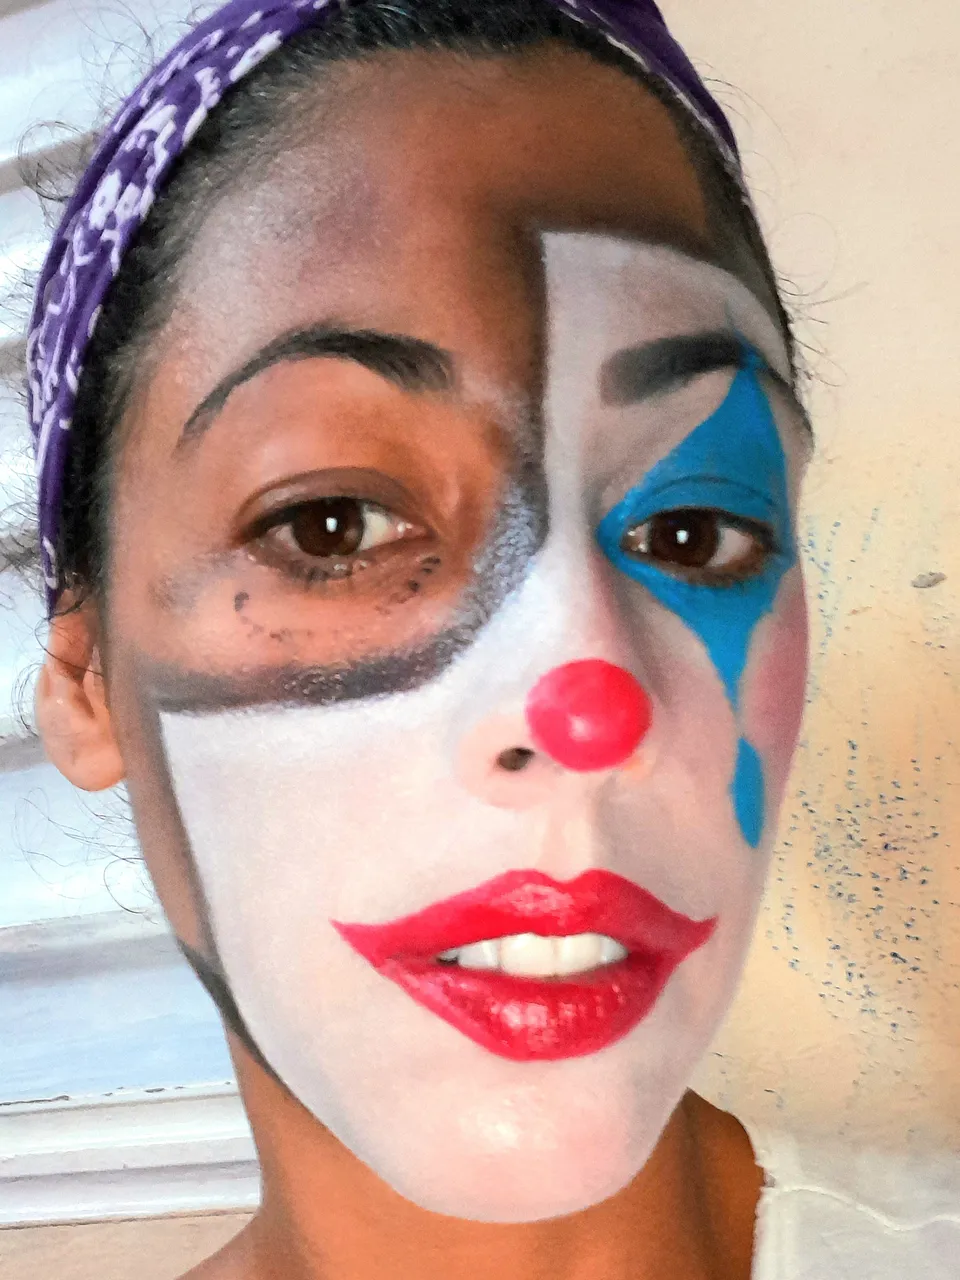
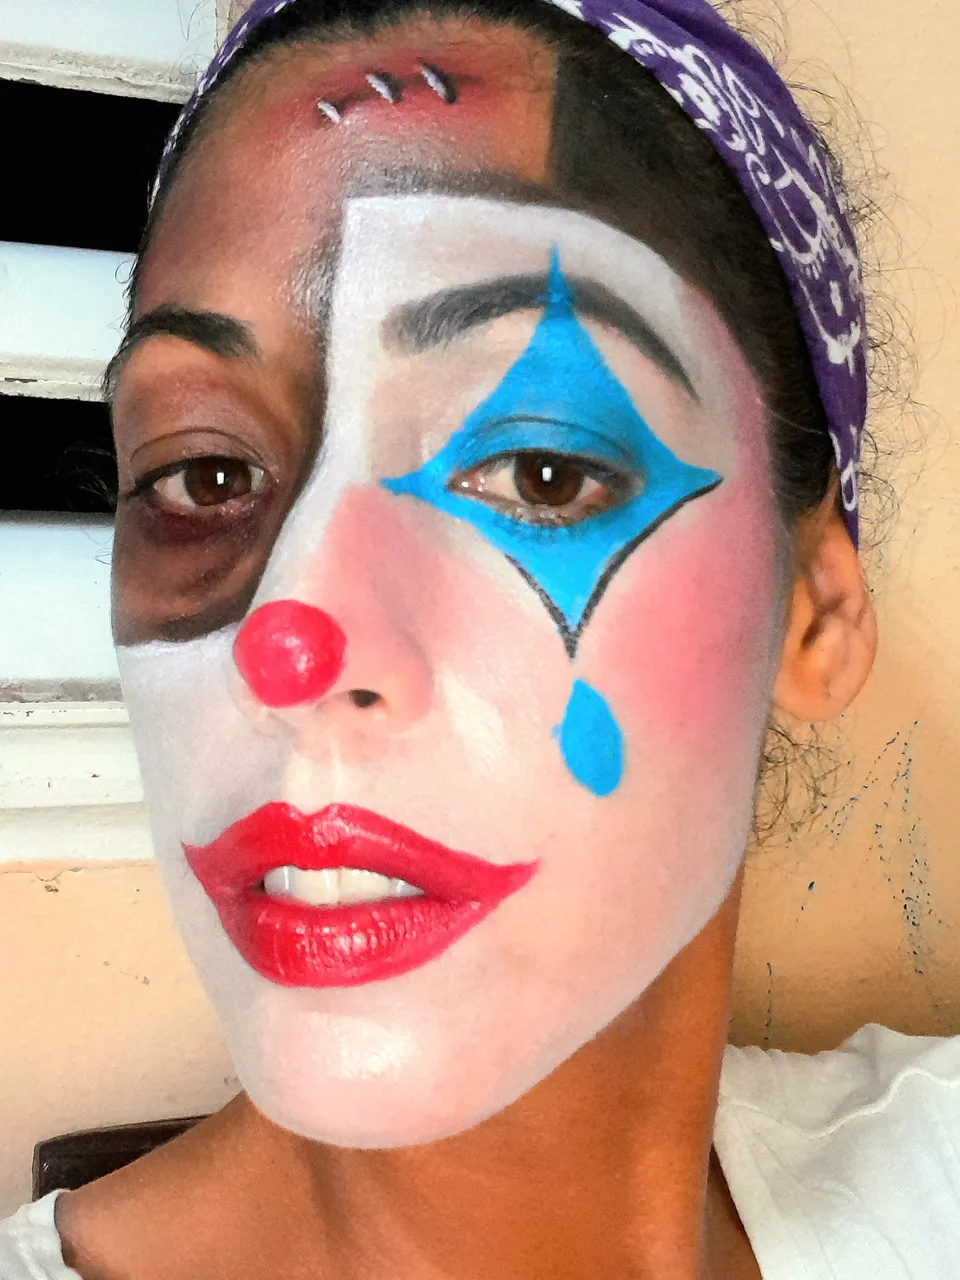
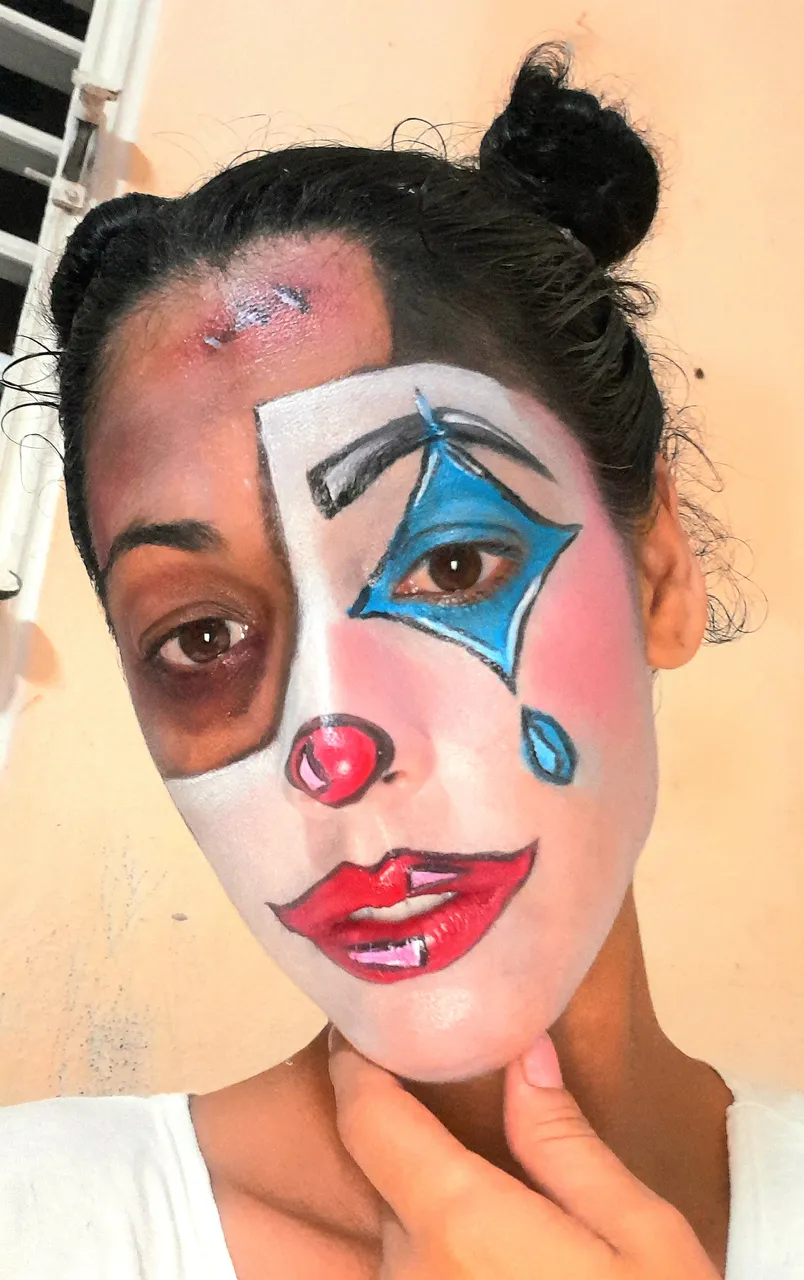
Este punto lo pueden saltar , si no les interesa dibujar la otra parte de la cara. Pero yo quise agregarle un poco de ojeras, unas cicatrices y algunos detallitos más.
Por qué?? Bueno, pues porque estamos en Halloween y quería darle un poquito más de terror 😱 a mi maquillaje. Pero ustedes pueden escoger lo que más les guste. Pueden dejarlo natural y también queda muy bien.
You can skip this point if you are not interested in drawing the other part of the face. But I wanted to add some dark circles under the eyes, some scars and some more details.
Why? Well, because it's Halloween and I wanted to give a little more horror 😱 to my makeup. But you can choose whatever you like. You can leave it natural and it looks great too.
Paso 5/Step 5
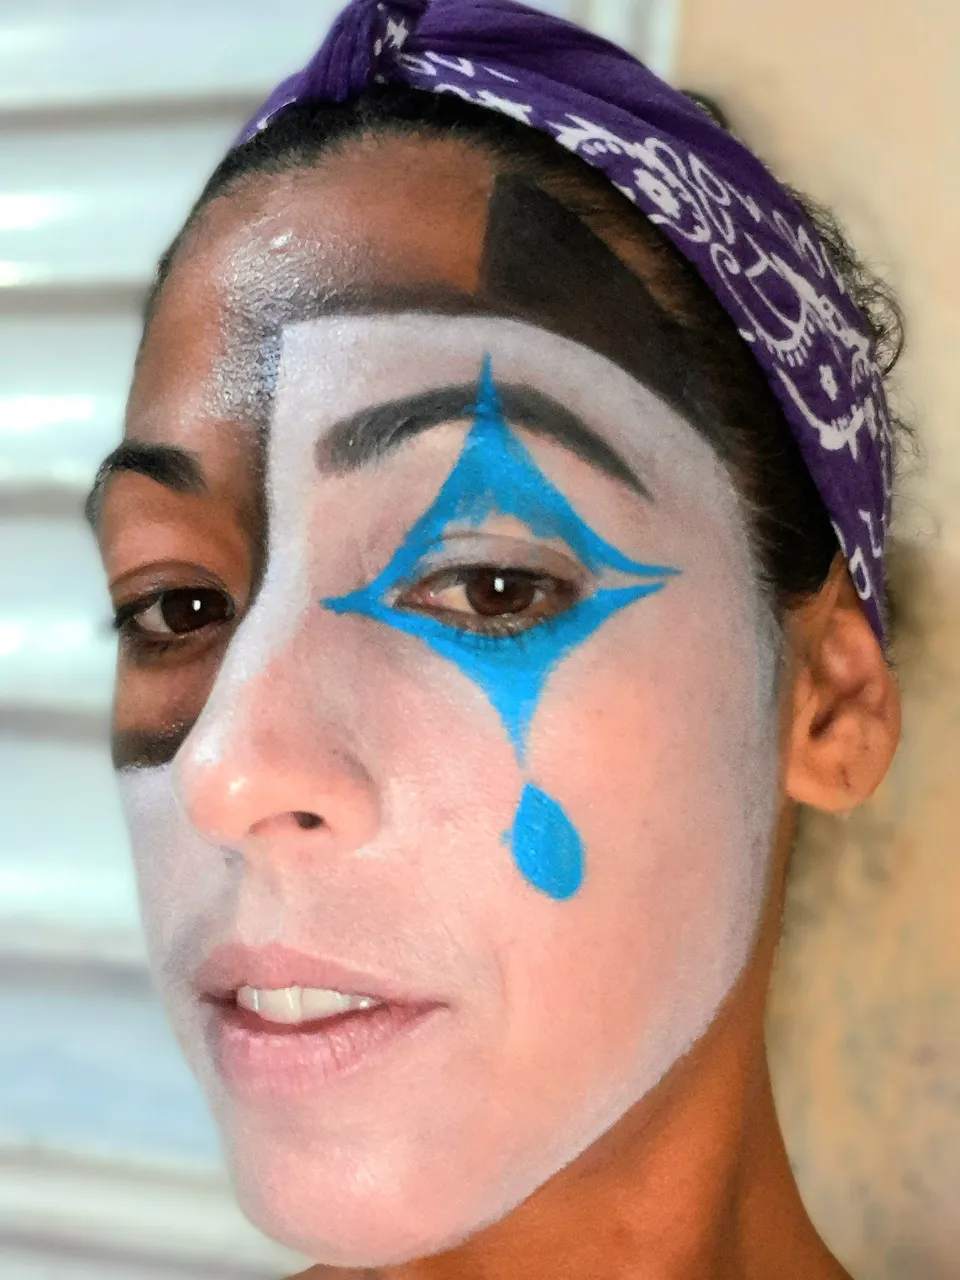
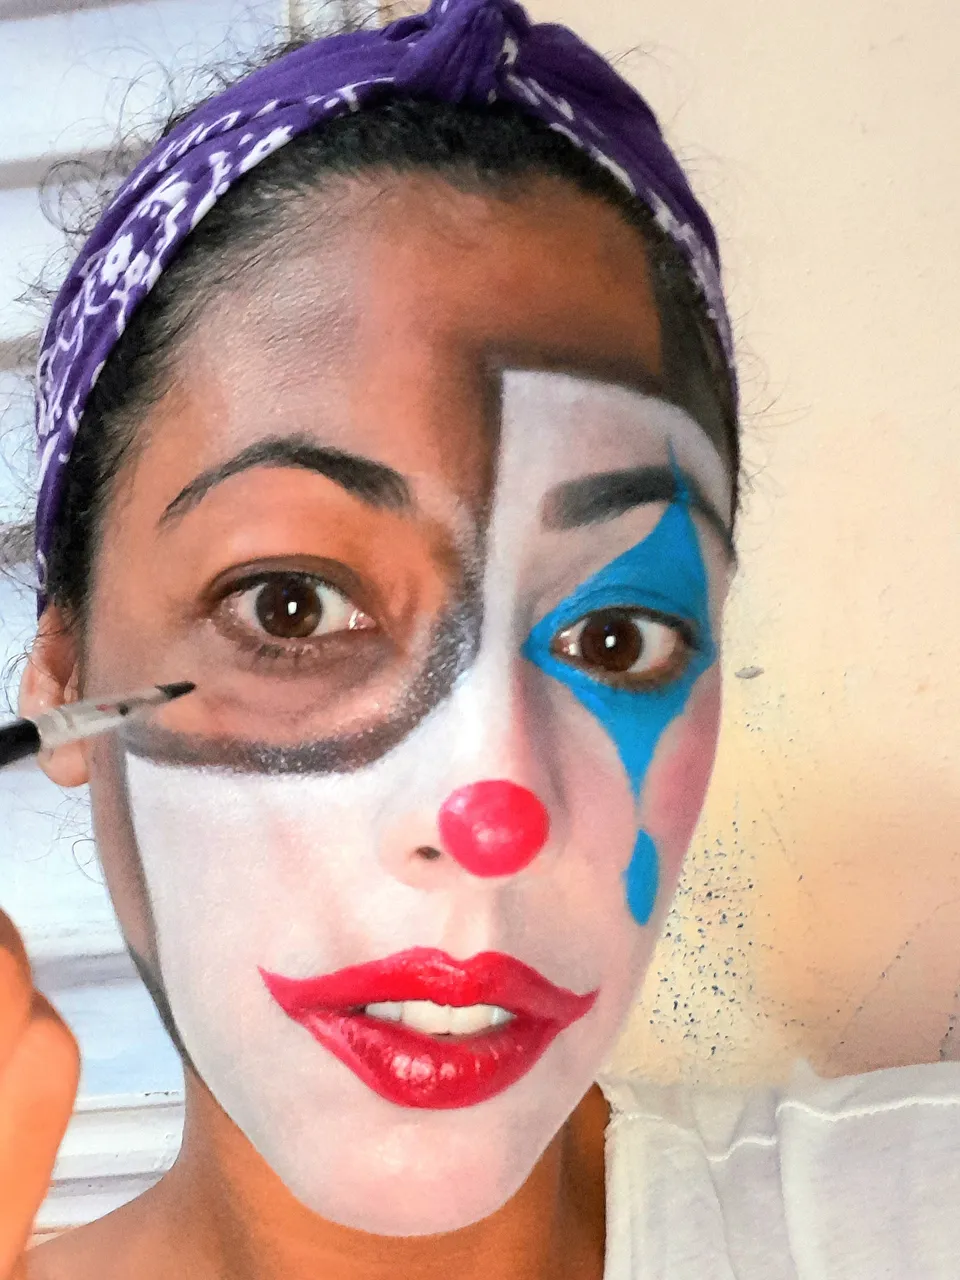
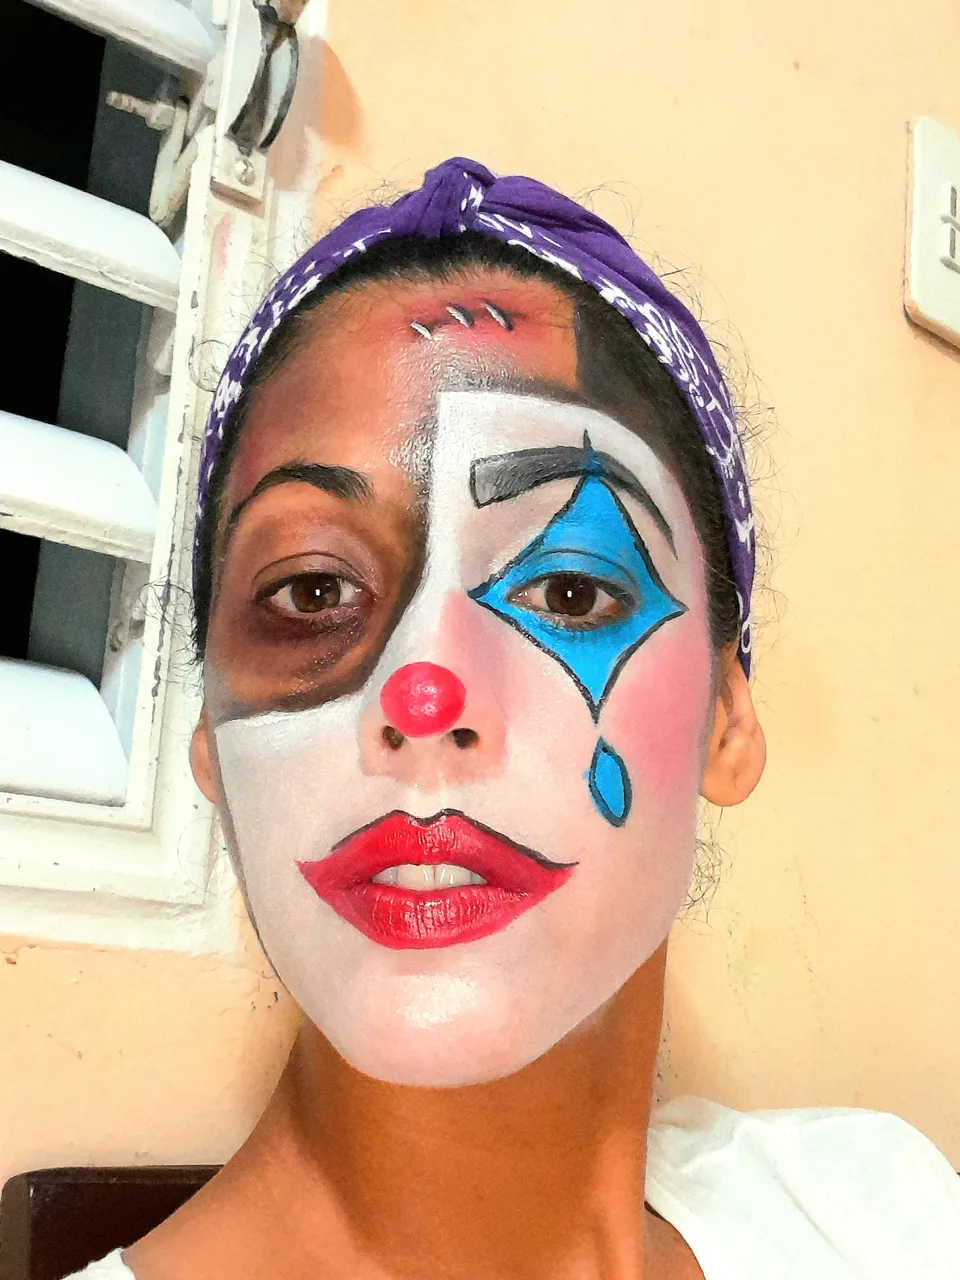
Con color negro y pincel fino vamos marcando todo lo que pintamos en la máscara, y con el color blanco damos brillo y lo marcamos alrededor con negro, como los dibujos de los cómics.
Lo entenderán mejor en las fotos.
With black color and fine brush we mark everything we paint on the mask, and with the white color we give brightness and we mark it around with black, like the drawings of the comics.
You will understand it better in the photos.
Paso 6/Step 6
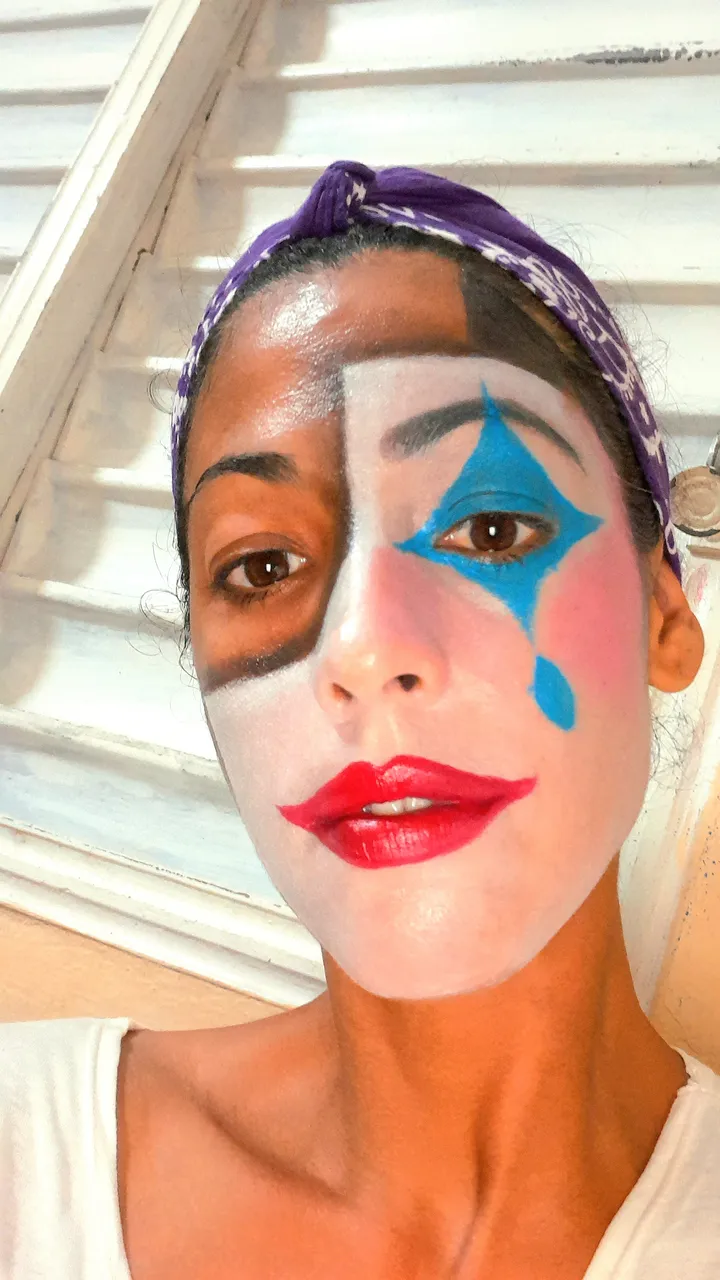
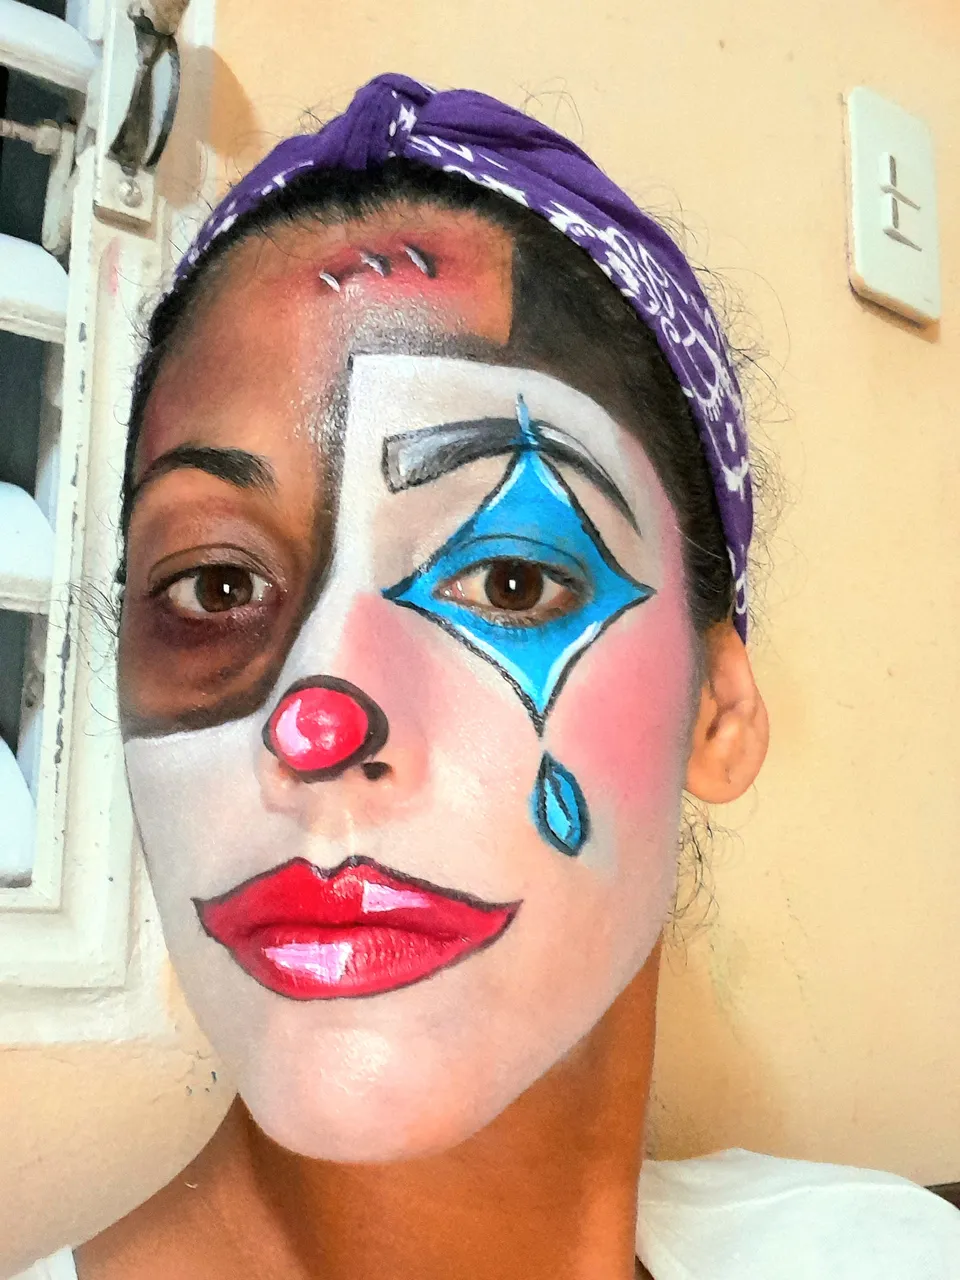
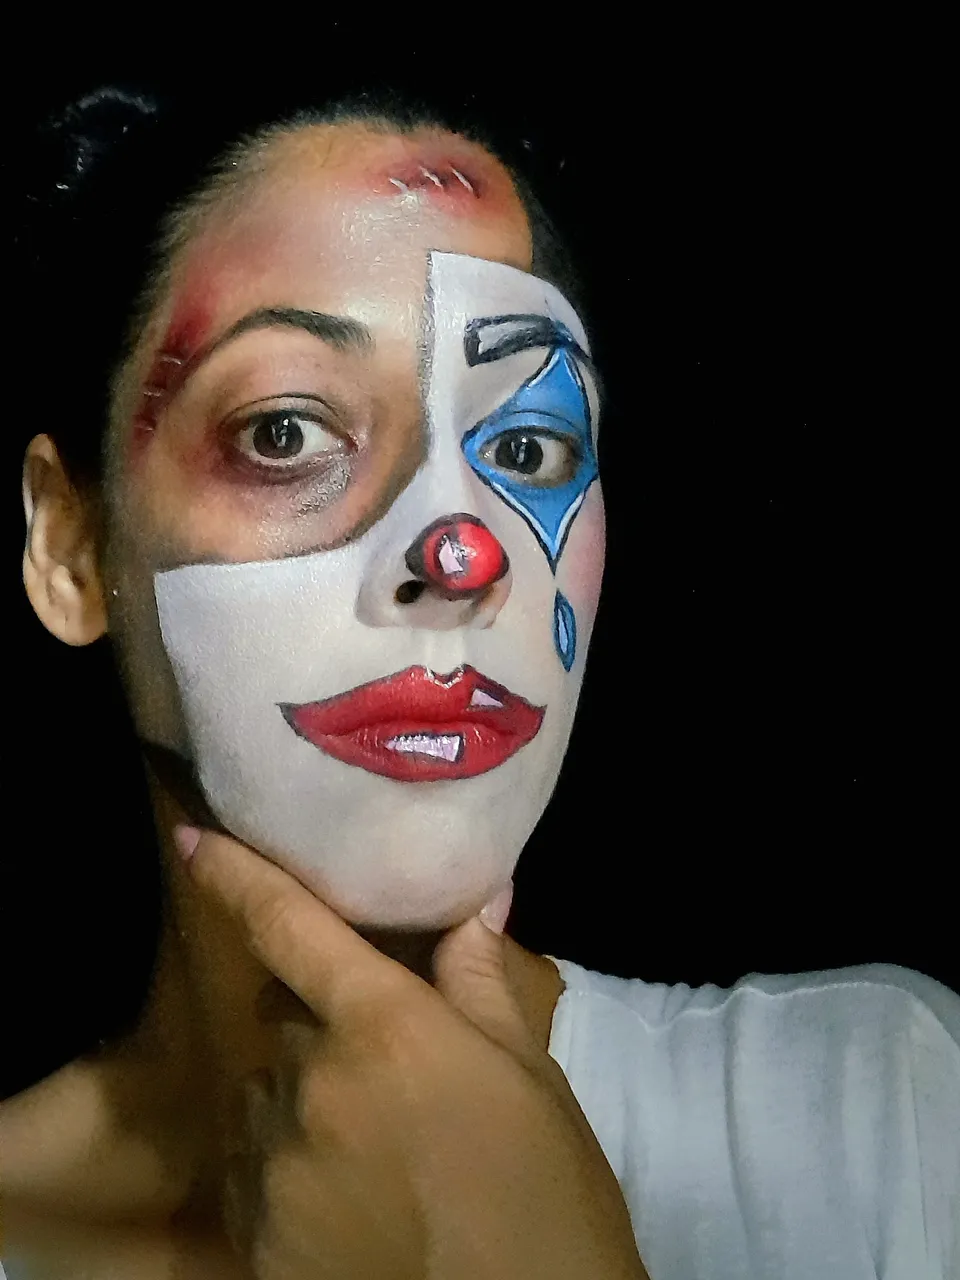
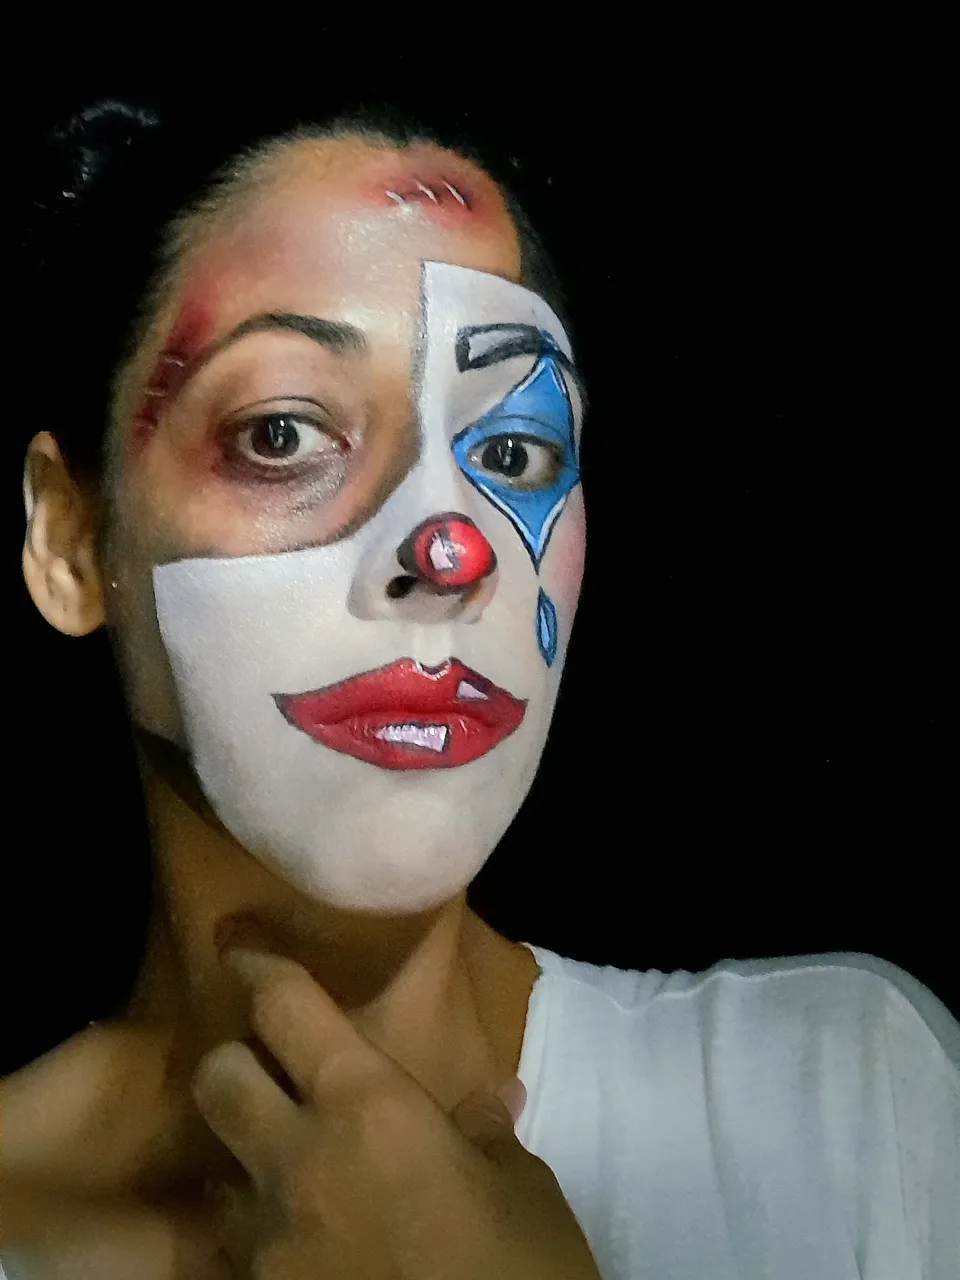
Por último, retocamos algún color, algún borde, algún detalle. En mi caso tuve que limpiar un poco de sombra pues se había corrido bastante.
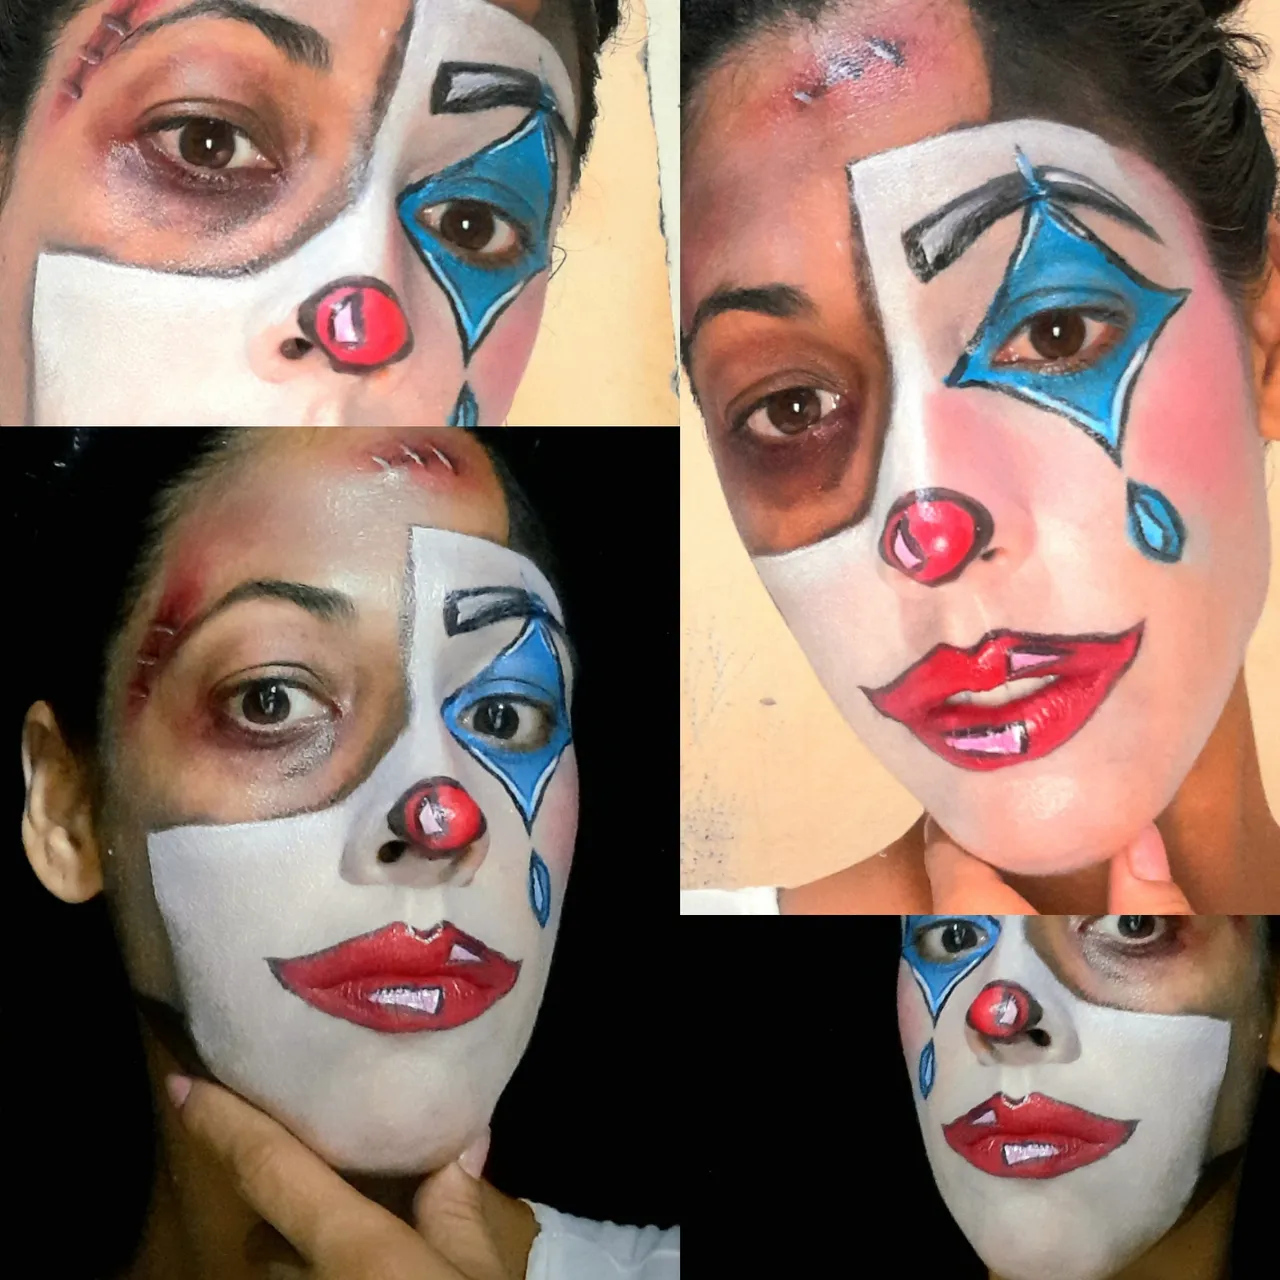
Y listo. Así ha quedado 👇
Finally, we retouch some color, some edge, some detail. In my case I had to clean a little bit of shadow because it had run quite a bit.
And that's it. This is how it looks 👇

Y ahora nos vamos al patio, para que el fondo se vea oscuro y se logré ver mejor el efecto. Ya saben que para la noche este maquillaje es ideal.
And now we go to the patio, so that the background looks dark and the effect can be seen better. You know that for the evening this makeup is ideal.
Espero que les haya gustado. No olviden comentar que les pareció, nuevas ideas y sugerencias. Se los agradeceré mucho.
I hope you liked it. I look forward to your comments and new ideas and suggestions.
Todas las fotos son tomadas por mi. Mi lenguaje nativo es el español para la traducción utilicé www.DeepL.com
All photos are taken by me. My native language is Spanish and I used www.DeepL.com for the translation.
Que tengan lindo día 😉. Nos vemos en la próxima.