Paso a paso para hacer tus propias cajitas de papel.
Bienvenidos a este sencillo paso a paso para crear tus propias cajas de papel o cualquier tipo de material similar.
Los materiales necesarios para hacer estas prácticas cajitas son dos:
1.- Papel (cartulina, cartón blando o cualquier material similar)
2.- Tus manos.
Hay que aclarar que la forma final en la que tendrá tu caja dependerá mucho de la forma del papel con el que empiezas a hacer tu caja. Por ejemplo, si haces una cajita con un papel tamaño carta (A4), quedará una caja cuadrada; por otra parte, si usas un papel de medidas distintas (más cuadradas o más rectangulares), te quedará una caja no tan cuadrada.
Sabiendo esto, este paso a paso lo haré con un papel de tamaño similar al A4 y quedará cuadrada como verán. Comencemos entonces.
Step by step to make your own paper boxes.
Welcome to this easy step-by-step on how to make your own little boxes out of paper or any similar type of material.
The materials needed to make these handy little boxes are two:
1.- Paper (cardboard, soft cardboard or any similar material)
2.- Your hands.
It is necessary to clarify that the final shape of your box will depend a lot on the shape of the paper with which you start making your box. For example, if you make a box with a letter size paper (A4), it will be a square box; on the other hand, if you use a different size paper (more square or more rectangular), you will get a box that is not so square.
Knowing this, I will do this step by step with a paper of similar size to A4 and it will be square as you will see. Let's start then.
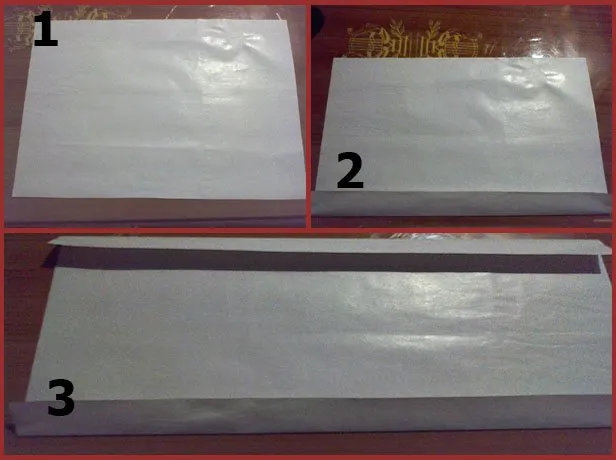
2.- Hacemos un doblez en uno de los costados del papel, de un tamaño similar al que está en la imagen de arriba.
3.- Una vez hecho el primer doblez, hacemos lo mismo con el otro lado para que nuestra hoja quede con dos dobleces.
2.- We make a fold on one of the sides of the paper, similar in size to the one in the image above.
3.- Once the first fold is done, we do the same with the other side so that our sheet has two folds.
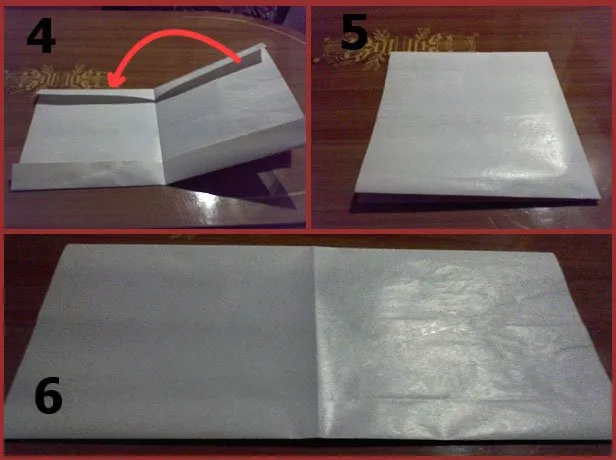
5.- Doblamos completamente la hoja para asegurarnos que esté lo más cuadrada posible.
6.- Seguidamente, extendemos la hoja y la volteamos boca abajo, con los dobleces hacia abajo.
5.- We fold the sheet completely to make sure it is as square as possible.
6.- Next, we extend the sheet and turn it upside down, with the folds down.
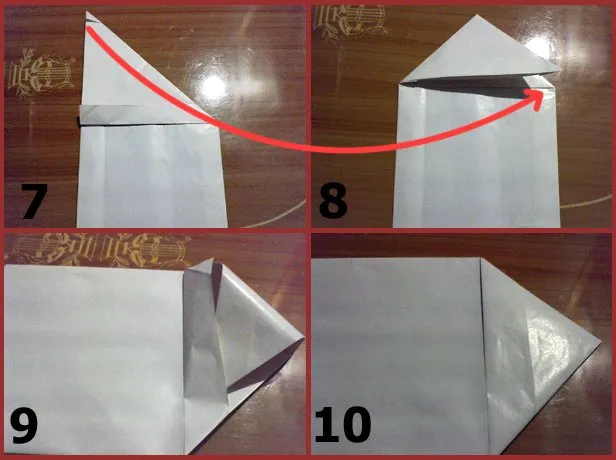
8.- Una vez hecho esto, doblamos ese mismo triángulo para hacer otro triángulo mucho más pequeño, como se aprecia en la imagen.
9.- Luego, guardamos la esquina suelta del triángulo dentro de la solapa que está debajo.
10.- Apretamos todo y nos quedará un triángulo bien sujeto en uno de los lados de nuestra hoja.
8.- Once this is done, we fold the same triangle to make another much smaller triangle, as shown in the image.
9.- Then, we keep the loose corner of the triangle inside the flap below it.
10.- Tighten everything and we will have a triangle well attached to one of the sides of our sheet.
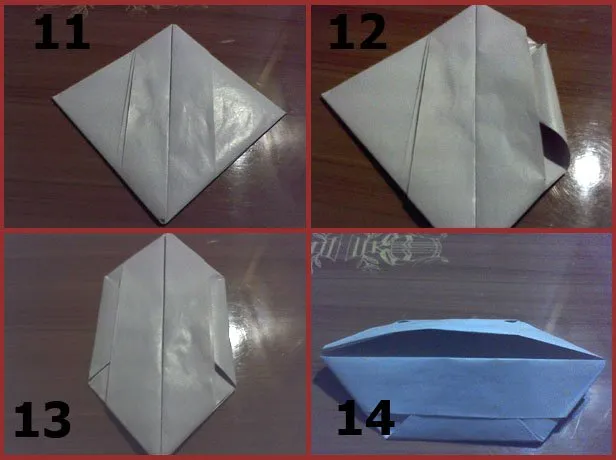
12.- Vemos que nuestro rombo está dividido a la mitad, habiendo dos triángulos a cada lado. Tomamos la esquina superior de uno de los triángulos y lo guardamos dentro de la solapa que tiene debajo, tal como se observa en la imagen de arriba (en el cuadro con el número 12).
13.- Repetimos el mismo proceso en el triángulo del otro lado y aplastamos bien nuestra figura, obteniendo un hexágono alargado.
14.- Una vez hecho esto, abrimos nuestro hexágono hacia arriba, separando hacia arriba los pliegues que están en medio.
12.- We see that our rhombus is divided in half, having two triangles on each side. We take the upper corner of one of the triangles and we keep it inside the flap underneath, as shown in the image above (in the box with the number 12).
13.- Repeat the same process on the triangle on the other side and flatten well our figure, obtaining an elongated hexagon.
14.- Once this is done, we open our hexagon upwards, separating upwards the folds that are in the middle.
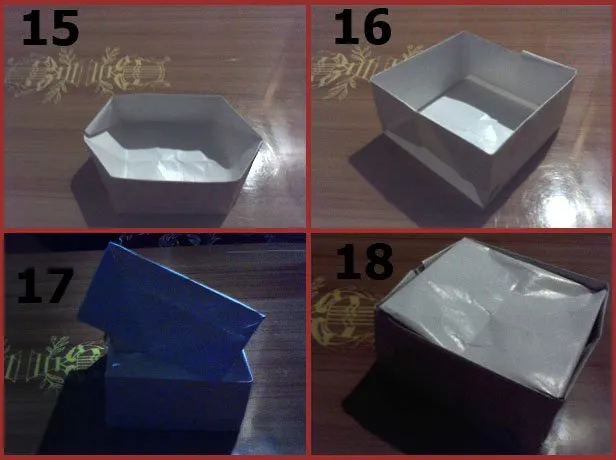
16.- Doblamos las esquinas y los bordes inferiores de nuestra caja para darle forma y estará lista.
17.- Podemos hacer otra caja, la cual podemos usar para colocársela encima a nuestra cajita.
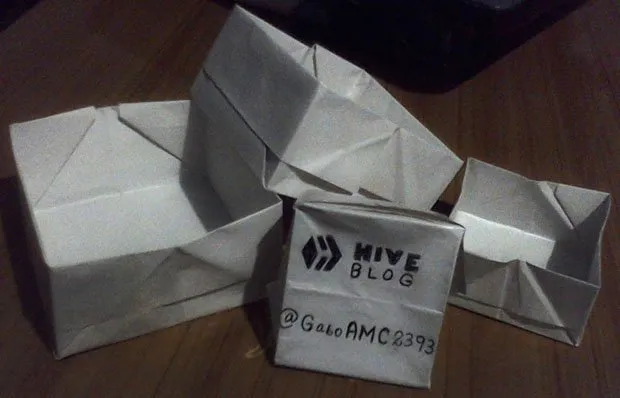
18.- Como se observa en la imagen, se pueden usar dos cajas, una como contenedor y otra como cubierta.
16.- Fold the corners and bottom edges of our box to give it shape and it will be ready.
17 .- We can make another box, which we can use to place it on top of our box.
18.- As you can see in the picture, you can use two boxes, one as a container and the other as a cover.